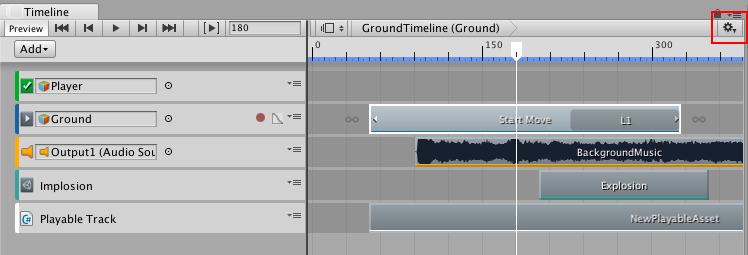
Timeline Settings
Use the TimelineGeneric term within Unity that refers to all features, windows, editors, and components related to creating, modifying, or reusing cut-scenes, cinematics, and game-play sequences. More info
See in Glossary Settings to set the unit of measurement for the Timeline AssetAny media or data that can be used in your game or Project. An asset may come from a file created outside of Unity, such as a 3D model, an audio file or an image. You can also create some asset types in Unity, such as an Animator Controller, an Audio Mixer or a Render Texture. More info
See in Glossary, to set the duration mode of the Timeline Asset, and to set the Timeline Editor window snap settings.

Seconds or Frames
Select either Seconds or Frames to set the Timeline Editor windowThe name of the window where you create, modify, and preview a Timeline instance. Modifications to a Timeline instance also affects the Timeline Asset. More info
See in Glossary to display time in either seconds or frames.
Duration Mode
Use the Duration Mode to set whether the duration of the Timeline AssetRefers to the tracks, clips, and recorded animation that comprise a cinematic, cut-scene, game-play sequence, or other effect created with the Timeline Editor window. A Timeline Asset does not include bindings to the GameObjects animated by the Timeline Asset. The bindings to scene GameObjects are stored in the Timeline instance. The Timeline Asset is Project-based. More info
See in Glossary extends to the end of the last clip (Based On Clips), or extends to a specific time or frame (Fixed Length). When the Duration Mode is set to Fixed Length, use one of the following methods to change the length of the Timeline Asset:
Select the Timeline Asset in the Project window and use the InspectorA Unity window that displays information about the currently selected GameObject, Asset or Project Settings, alowing you to inspect and edit the values. More info
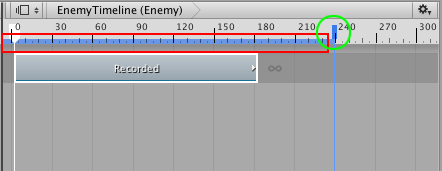
See in Glossary window to set the Duration in seconds or frames.In the Timeline Editor window, drag the blue marker on the timeline. The blue marker indicates the end of the Timeline Asset. A blue line indicates the duration of the Timeline Asset.

Frame Rate
Select one of the options under frame rate to set the play speed of the Timeline Asset. The overall speed of the Timeline Asset accelerates or decelerates based on the number of frames per secondThe frequency at which consecutive frames are displayed in a running game. More info
See in Glossary. The higher the number of frames per second, the faster the entire timeline plays. The following frame rates are supported: Film (24 fps), PAL (25 fps), NTSC (29.97 fps), 30, 50, or 60.
Show Audio Waveforms
Enable Show Audio Waveforms to draw the waveforms for all audio clipsA container for audio data in Unity. Unity supports mono, stereo and multichannel audio assets (up to eight channels). Unity can import .aif, .wav, .mp3, and .ogg audio file format, and .xm, .mod, .it, and .s3m tracker module formats. More info
See in Glossary on all audio tracks. For example, use an audio waveform as a guide when manually positioning an Audio clip of footsteps with the Animation clipAnimation data that can be used for animated characters or simple animations. It is a simple “unit” piece of motion, such as (one specific instance of) “Idle”, “Walk” or “Run”. More info
See in Glossary of a humanoid walking. Disable Show Audio Waveform to hide audio waveforms. Show Audio Waveforms is enabled by default.
Snap to Frame
Enable Snap to Frame to manipulate clips, preview Timeline instancesRefers to the link between a Timeline Asset and the GameObjects that the Timeline Asset animates in the scene. You create a Timeline instance by associating a Timeline Asset to a GameObject through a Playable Director component. The Timeline instance is scene-based. More info
See in Glossary, drag the playhead, and position the playhead using frames. Disable Snap to Frame to use subframes. Snap to Frame is enabled by default.
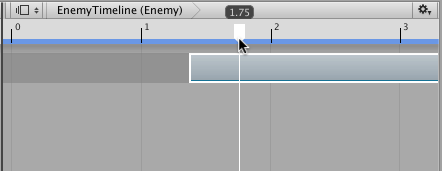
For example, when Snap to Frame is disabled and you drag the Timeline PlayheadThe white marker and line that indicates the exact point in time being previewed in the Timeline Editor window. More info
See in Glossary, it moves the playhead between frames, the format of Playhead Location displays differently depending on whether the timeline is set to Seconds or FramesA single image from a sequence of images that represent moving graphics. While you game is running, the camera in your game renders frames to the screen as fast as possible. May also refer to a frame from a video clip, or sprite animation frames. See: frames per second (FPS).
See in Glossary:
When the timeline is set to Frames, the Playhead Location fieldThe field that expresses the location of the Timeline Playhead in either frames or seconds, depending on the Timeline Settings. More info
See in Glossary shows frames and subframes. For example, 8 frames and 34 subframes displays as 8.34.When the timeline is set to Seconds, the Playhead Location field shows seconds, frames, and subframes. For example, 6 seconds, 17 frames, and 59 subframes displays as 6:17 [.59].

Manipulating clips, previewing Timeline instances, and positioning the playhead at the subframes level is useful when attempting to synchronize animation and effects with audio. Many high-end audio processing software products create audio waveforms with subframe accuracy.
Edge Snap
Enable the Edge Snap option to snap clips during positioning, trimming, and creating blends. When enabled, clips are snapped when the start or end of a clip is dragged within 10 pixelsThe smallest unit in a computer image. Pixel size depends on your screen resolution. Pixel lighting is calculated at every screen pixel. More info
See in Glossary of the start or end of a clip on another track, the start or end of a clip on the same track, the start or end of the entire timeline, or the playhead. Disable Edge Snap to create accurate blends, ease-ins, or ease-outs. Edge Snap is enabled by default.
- 2017–12–07 Page amended with limited editorial review
Did you find this page useful? Please give it a rating: