Enabling Cloud Build with Collaborate
Unity Cloud Build is a continuous integration service for Unity Projects. For more information, see Unity Cloud BuildAbbreviation of Cloud Build
See in Glossary.
Before you can use Cloud Build with Collaborate, you must enable Collaborate on your Unity Project. For more information, see Setting up Unity Collaborate.
To enable Cloud Build with Unity Collaborate:
On the Unity Editor menu bar, select Window > General > ServicesA Unity facility that provides a growing range of complimentary services to help you make games and engage, retain and monetize audiences. More info
See in Glossary.In the Services window, click the CollaborateA Unity cloud-hosted service that provides a simple way for teams to save, share, and contribute to their Unity Project. More info
See in Glossary tab.In the Collaborate window, click Open the history panel.
-
To open the Cloud BuildA continuous integration service for Unity Projects that automates the process of creating builds on Unity’s servers. More info
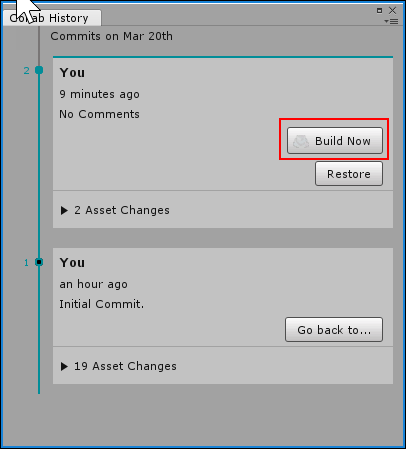
See in Glossary window, click the build now button.
-
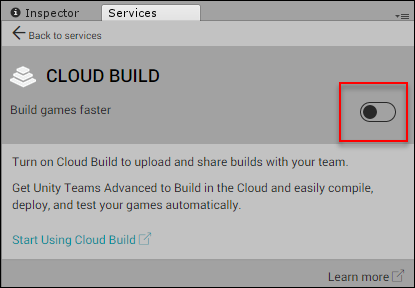
To enable Cloud Build, click the Build games faster toggle.

-
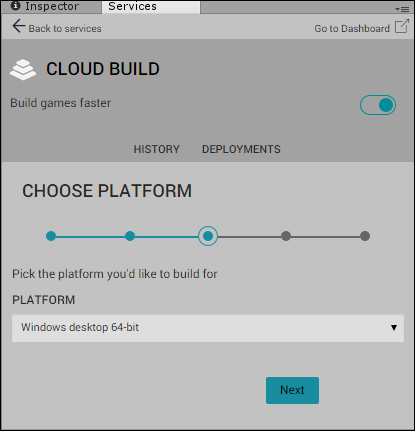
From the PLATFORM drop-down menu, select the build platform.

Click Next.
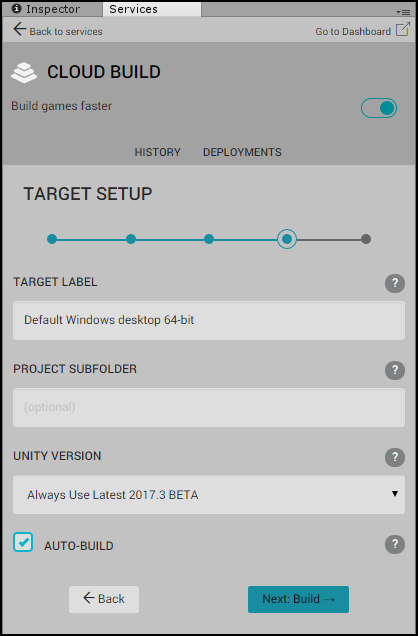
- In the TARGET SETUP window:
- In the TARGET LABEL textbox, enter a name to identify the build.
- From the UNITY VERSION drop-down menu, choose the Unity version to use for the build.
- If your root folder does not contain your Assets and Project SettingsA broad collection of settings which allow you to configure how Physics, Audio, Networking, Graphics, Input and many other areas of your Project behave. More info
See in Glossary, specify the location in the PROJECT SUBFOLDER textbox.

To start the initial build of your Project, click Next: Build.
Did you find this page useful? Please give it a rating: