Creating and editing Terrains
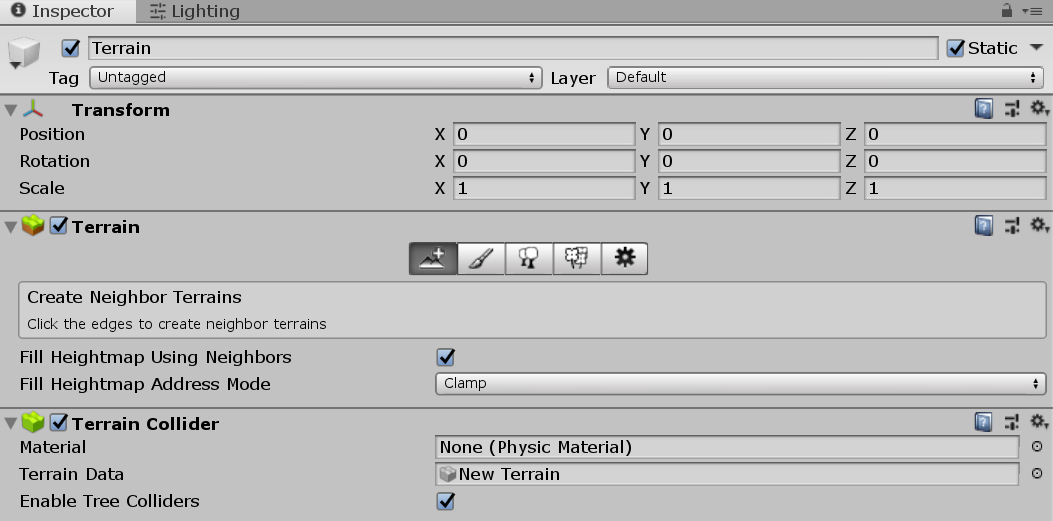
To add a Terrain GameObject to your Scene, select GameObject > 3D Object > Terrain from the menu. This also adds a corresponding Terrain Asset to the Project view. When you do this, the landscape is initially a large, flat plane. The Terrain’s Inspector window provides a number of tools to create detailed landscape features.

Terrain editing tools in the Inspector
The toolbarA row of buttons and basic controls at the top of the Unity Editor that allows you to interact with the Editor in various ways (e.g. scaling, translation). More info
See in Glossary provides five options to adjust your Terrain:
- Create adjacent Terrain tiles.
- Sculpt and paint your Terrain.
- Add trees.
- Add details such as grass, flowers, and rocks.
- Change general settings for the selected Terrain.
For more information about each of these icons, see Create Neighbor Terrains, Terrain tools, TreesA GameObject and associated Component that allows you to add tree assets to your scene. You can add branch levels and leaves to trees in the Tree Inspector window. More info
See in Glossary, Grass and other details, and Terrain Settings.
Select the paintbrush icon to access painting tools, which allow you to modify the Terrain. Use the cursor to sculpt the height of the Terrain, or paint texture onto the Terrain. Choose from several built-in Brush shapes, or define your own Brush using a texture. You can also change the size and opacity (the strength of the applied effect) of the Brush. Once you’ve defined the properties, your cursor takes the shape of the selected Brush. Click or drag on the Terrain to create different shapes and textures.
Similar to how you paint with a Brush on the Terrain, you can add textures, trees, and details like grass, flowers, and rocks. You can also create additional connected Terrain tiles, change the height of an entire tile, and even write custom Brushes with complex effects.
Terrain keyboard shortcuts
The Terrain InspectorA Unity window that displays information about the currently selected GameObject, Asset or Project Settings, alowing you to inspect and edit the values. More info
See in Glossary has the following keyboard shortcuts enabled by default.
| Keys | Function |
|---|---|
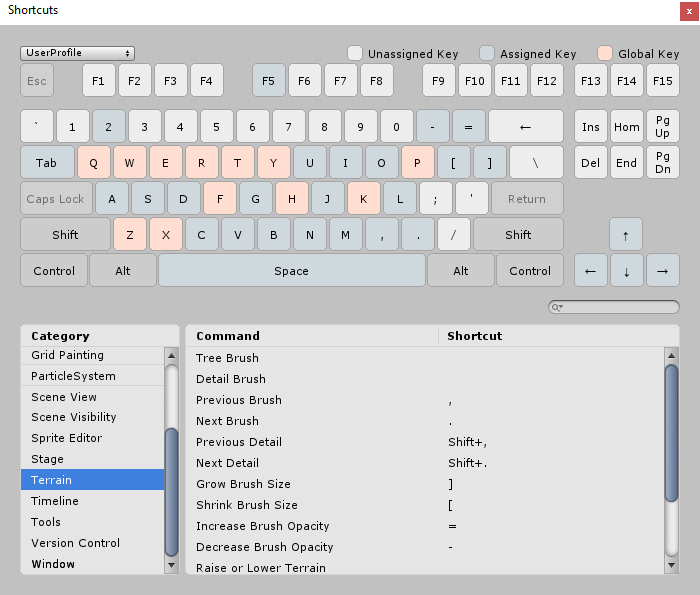
| Comma ( , ) and Period ( . ) | Cycle through the available Brushes |
| Shift-Comma ( < ) and Shift-Period ( > ) | Cycle through the available objects for trees, textures, and details |
| Open Bracket ( [ ) and Close Bracket ( ] ) | Decrease and increase the Brush Size |
| Minus ( - ) and Equal ( = ) | Decrease and increase Brush Opacity |
To set your own custom shortcuts, use the Shortcuts Manager.
- On Windows and Linux, select Edit > Shortcuts.
- On macOS, select Unity > Shortcuts.
Under CategoryA Profiler category identifies the workload data for a Unity subsystem (for example, Rendering, Scripting and Animation categories). Unity applies colour-coding to categories to help visually distinguish the types of data in the Profiler window. More info
See in Glossary, select Terrain to display Terrain-related shortcut assignments. For more information about setting and modifying shortcuts, see the Shortcuts Manager page.

Additionally, the standard F keystroke works slightly differently for Terrain. As Terrains are typically very large, when you press the F key, the Scene viewAn interactive view into the world you are creating. You use the Scene View to select and position scenery, characters, cameras, lights, and all other types of Game Object. More info
See in Glossary focuses on the area where you position the cursor. This provides a very quick and intuitive way to jump to the Terrain area you want to edit. If you press F while the cursor is not over a Terrain tile, it uses the standard framing behavior, framing the selection around the whole GameObjectThe fundamental object in Unity scenes, which can represent characters, props, scenery, cameras, waypoints, and more. A GameObject’s functionality is defined by the Components attached to it. More info
See in Glossary when you place the cursor over the Scene view.
Additional resources
2019–04–17 Page amended with editorial review
Updated content to match new UI and added information about keyboard shortcuts
Did you find this page useful? Please give it a rating: