Sprite Atlas workflow
Follow the steps below to create a SpriteA 2D graphic objects. If you are used to working in 3D, Sprites are essentially just standard textures but there are special techniques for combining and managing sprite textures for efficiency and convenience during development. More info
See in Glossary Atlas:
- Create a Sprite Atlas Asset.
- Select a list of Objects for Packing into the Sprite Atlas.
- Enable Include in build on Sprite Atlases to include them with the project.
- (Optional) Create a Variant Sprite Atlas.
- (Optional) Prepare Sprite Atlases for distribution.
- Sprites prepared for distribution need to be loaded via Late Binding with a script.
- (Optional) Optimize Sprite Atlas usage and size in your Project for improved performance.
Create a Sprite Atlas Asset
To create the Sprite AtlasA texture that is composed of several smaller textures. Also referred to as a texture atlas, image sprite, sprite sheet or packed texture. More info
See in Glossary Asset, go to Asset > Create > Sprite Atlas. Unity creates the Sprite Atlas in the Asset folder, with the file extension * .spriteatlas.
Selecting items for the Objects for Packing list
The Objects for Packing list displays the currently selected items that are in the Sprite Atlas. You can place Texture2D and Sprite Assets in this list. Drag and drop a folder directly onto the list to automatically add all valid content within the folder to the list (only the folder appears on the list).
To select specific items for the list:
-
Select the Sprite Atlas Asset and find the Objects For Packing list in its InspectorA Unity window that displays information about the currently selected GameObject, asset or project settings, allowing you to inspect and edit the values. More info
See in Glossary window. It displays the list of items for Unity to pack when it builds the Sprite Atlas.
-
To add items, select the plus (+) icon at the lower right of the list to create a new row. Drag a valid Asset onto an empty row to add it to the list, or select the circle icon to the right of the row to open the Select Object window. Select an Asset from the Object Picker window to add it to the list:

To remove an item from the list, click the minus (-) icon at the lower right of the Objects For Packing list. To replace an item, drag another item to the row it occupies to replace it on the list.
-
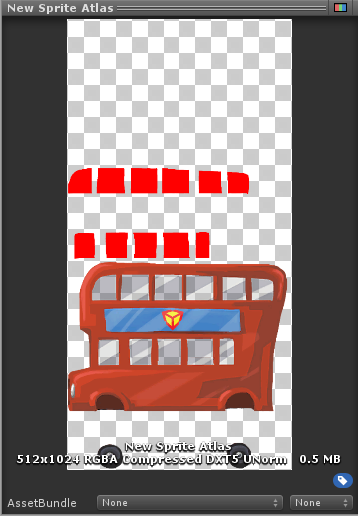
Select Pack Preview to preview the combined Atlas Texture in the Asset Preview window.

Include in Build
All Sprite Atlases have Include in Build enabled by default when created. This means that Unity includes the Sprite Atlases with the Project’s buildThe process of compiling your project into a format that is ready to run on a specific platform or platforms. More info
See in Glossary and automatically loads them at the build’s run time. Enable or disable the ‘Include in Build’ property to control which Sprite Atlases are included in the Project build.

Clearing ‘Include in Build’ disables this behavior, and is done when preparing a Sprite Atlas for distribution.
How to optimize Sprite Atlas usage and size for improved performance
When a Sprite is active in a SceneA Scene contains the environments and menus of your game. Think of each unique Scene file as a unique level. In each Scene, you place your environments, obstacles, and decorations, essentially designing and building your game in pieces. More info
See in Glossary, Unity loads the Sprite Atlas it belongs to and all the Textures it contains. This can cause excessive performance overhead if Unity loads a Sprite Atlas with very large Textures when nothing in the Scene is using most of those Textures.
To optimize Sprite Atlas usage, ideally all or most Sprites that are active in the Scene should belong to the same Atlas. It is good practice to split Sprite Textures into multiple smaller Atlases according to their common usage.
Another way to reduce performance overhead is to reduce the empty space between packed Textures in the Sprite Atlas. This reduces the size of the Sprite Atlas. To do this, select the Sprite Atlas and inspect the packed Atlas Texture in the Pack Preview window at the bottom of its Inspector settings. If there is no Preview available, select the Pack Preview button under the Objects for Packing list to generate the packed Texture.

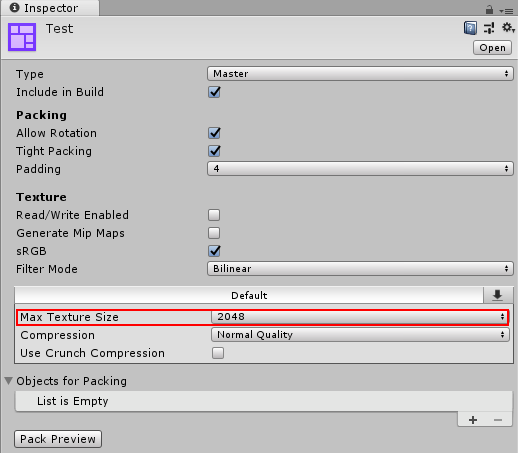
If there is excess empty space visible, you can manually reduce the size of the packed Texture to reduce the amount of empty space and optimize the Atlas’s size. To do so, go to the Platform-specific overrides panel at the bottom of the Inspector window. Select a lower value from the drop-down menu of the Max Texture Size setting, then select Pack Preview to regenerate the packed Texture.

When the Max Texture Size value is lower than the current dimensions of the Sprite Atlas Texture, Unity reduces the packed Texture dimensions to match the set Max Texture Size as closely as possible, and automatically trims away any extra empty space. If there are selected Sprite Textures that exceed the Max Texture Size setting of the Sprite Atlas, then the Sprite Atlas ignores the Max Texture Size setting and remains at the minimum size required to contain the Sprite Textures at their original dimensions.
