Working in the Inspector
This page describes some options for controlling the InspectorA Unity window that displays information about the currently selected GameObject, asset or project settings, allowing you to inspect and edit the values. More info
See in Glossary window itself. For information about setting properties for GameObjectsThe fundamental object in Unity scenes, which can represent characters, props, scenery, cameras, waypoints, and more. A GameObject’s functionality is defined by the Components attached to it. More info
See in Glossary, scriptsA piece of code that allows you to create your own Components, trigger game events, modify Component properties over time and respond to user input in any way you like. More info
See in Glossary, and Assets, see Editing properties.
Lock the Inspector
Normally, the Inspector shows the properties of the currently selected GameObject, script, or Asset. But sometimes, it’s useful to keep one item in the Inspector while you work with other items. In that case, you can lock an Inspector window to a specific item.
To lock an Inspector window to an item, click the lock icon in the Inspector window. The lock icon changes to show that the Inspector is now locked to the selection.

This is useful when you’re editing one item’s properties frequently. For example, if you’re fine-tuning a Camera’s position, you can lock an Inspector window to the Camera, and open a second Inspector window (More Items (⋮) menu: Add Tab > Inspector) to continue displaying the properties of the current selection.
| Note: |
|---|
| Focused Inspectors are an alternative to locking the Inspector window. A focused Inspector only ever displays the properties of the item you open it for. |
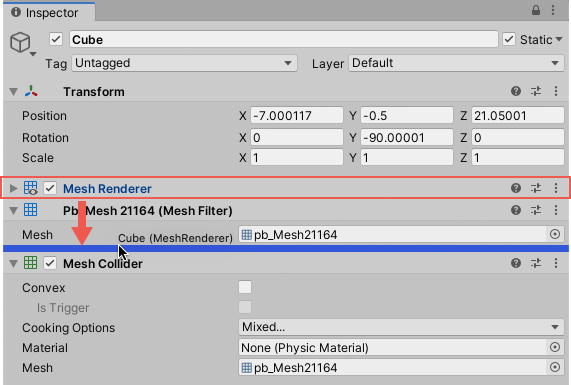
Reorder GameObject components
You can reorder a GameObject’s components in the Inspector window. The component order you apply in the Inspector is the same order that you need to use when you query components in your scripts.
A GameObject’s Transform componentA Transform component determines the Position, Rotation, and Scale of each object in the scene. Every GameObject has a Transform. More info
See in Glossary is always the topmost component. You cannot move it, or place other components above it.
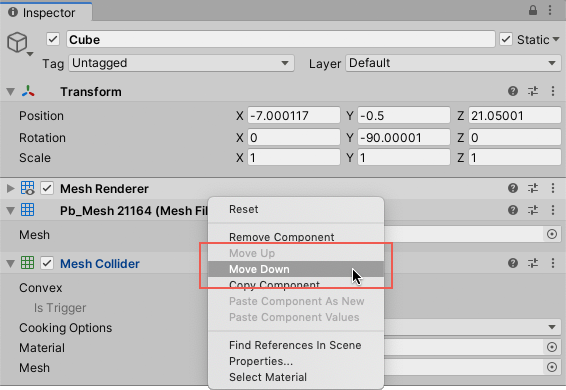
To reorder a GameObject’s components in the Inspector window, do one of the following:
- Drag-and-drop component headers from one position to another. When you drag a component header, a blue insertion marker appears where Unity will place the component.
- Right-click a component to open the context menu, and select Move Up or Move Down.
Reordering components for multiple GameObjects
When you select multiple GameObjects, the Inspector displays all of the components that the selected GameObjects have in common. If you reorder these common components, the changes apply to all of the selected GameObjects.
Assign icons
You can assign custom icons to GameObjects, PrefabsAn asset type that allows you to store a GameObject complete with components and properties. The prefab acts as a template from which you can create new object instances in the scene. More info
See in Glossary, and scripts from the Inspector window. Custom icons appear in the Scene viewAn interactive view into the world you are creating. You use the Scene View to select and position scenery, characters, cameras, lights, and all other types of Game Object. More info
See in Glossary in the same way as default icons for items such as Lights and CamerasA component which creates an image of a particular viewpoint in your scene. The output is either drawn to the screen or captured as a texture. More info
See in Glossary.
- When you assign an icon to a GameObject, the icon appears in the SceneA Scene contains the environments and menus of your game. Think of each unique Scene file as a unique level. In each Scene, you place your environments, obstacles, and decorations, essentially designing and building your game in pieces. More info
See in Glossary view over that GameObject, and any duplicates. - When you assign an icon to a Prefab, the icon appears in the Scene view over any instances of that Prefab.
- When you assign an icon to a script, the icon appears in the Scene view over any GameObject that has the script attached.
To control how Unity draws custom icons in the Scene view, use the Gizmos menu.
| NOTE |
|---|
| When you change an Asset’s icon, Unity marks the Asset as modified, and version controlA system for managing file changes. You can use Unity in conjunction with most common version control tools, including Perforce, Git, Mercurial and PlasticSCM. More info See in Glossary systems register the change. |
Assign custom icons to GameObjects, scripts, and Prefabs
To assign a custom icon to a GameObject or a script:
- Open the item in an Inspector window.
- Click the Select icon button.
- Choose an icon from the Select icon menu (see below).
To assign a custom icon to a Prefab, you must open the Prefab in Prefab Mode.
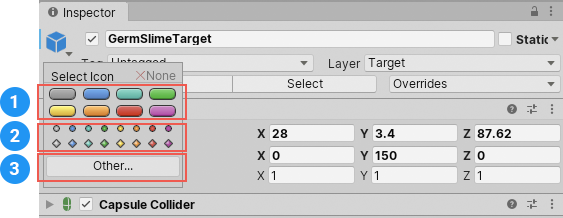
Choose icons from the Select icon menu
You assign custom Icons from the Select Icon menu.
| Icon type: | Description: |
|---|---|
| 1 | Label icons are colored capsules. In the Scene view, they display the names of the items they’re assigned to. Click a label icon to assign it. |
| 2 | Image-only icons are colored divots. They’re useful when you work with objects that may not have a visual representation. For example, you can assign image-only icons to navigation waypoints so you can see and select them in the Scene view. Click an image-only icon to assign it. |
| 3 | Asset icons are image Assets in your Scene that you use as custom icons. For example, you could use a skull and crossbones icon to indicate danger areas in a game level. Click the Other button to open an Object Picker window and select an image Asset to assign as an icon. |
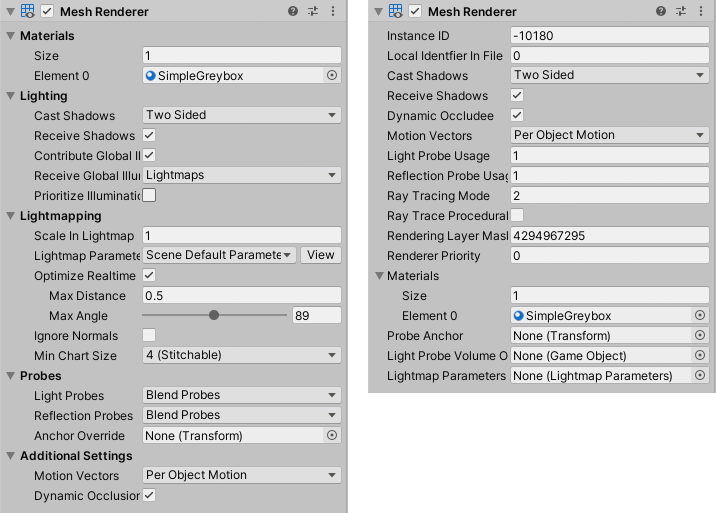
Toggle Debug Mode
Normally, the Inspector window is configured as an editor for the selection’s properties. But sometimes it’s useful to only see the properties and their values. When you activate Debug mode, the Inspector shows only the properties and their values. If the selection has script components, Debug mode also displays private variables, although you can’t edit their values.
You can toggle Debug mode for each Inspector window individually.
- To turn on Debug mode, click the More Items (⋮) button to open the context menu, and select Debug.
- To return to Normal mode, click the More Items (⋮) button to open the context menu, and select Normal.
- Reorganized Inspector section pages in Unity 2020.1