Light Probes for moving objects
Lightmapping adds greatly to the realism of a scene by capturing realistic bounced light as textures which are “baked” onto the surface of static objects. However, due to the nature of lightmapping, it can only be applied to non-moving objects marked as Contribute GI.
While realtime and mixed mode lights can cast direct light on moving objects, moving objects do not receive bounced light from your static environment unless you use light probesLight probes store information about how light passes through space in your scene. A collection of light probes arranged within a given space can improve lighting on moving objects and static LOD scenery within that space. More info
See in Glossary. Light probes store information about how light is bouncing around in your sceneA Scene contains the environments and menus of your game. Think of each unique Scene file as a unique level. In each Scene, you place your environments, obstacles, and decorations, essentially designing and building your game in pieces. More info
See in Glossary. Therefore as objects move through the spaces in your game environment, they can use the information stored in your light probes to show an approximation of the bounced light at their current position.
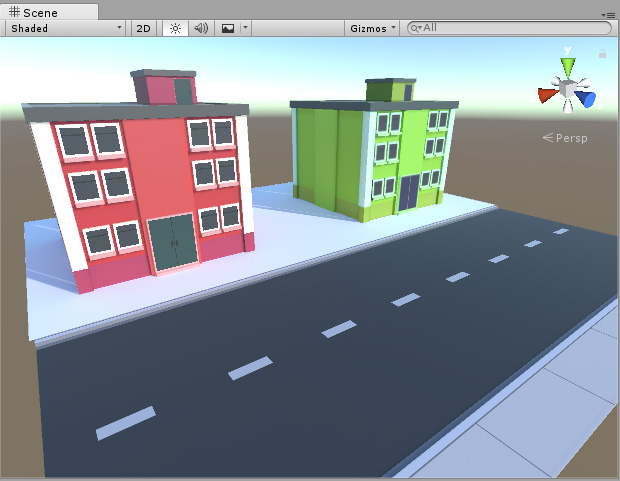
In the above scene, as the directional light hits the red and green buildings, which are static scenery, bounced light is cast into the scene. The bounced light is visible as a red and green tint on the ground directly in front of each building. Because all these models are static, all this lighting is stored in lightmapsA pre-rendered texture that contains the effects of light sources on static objects in the scene. Lightmaps are overlaid on top of scene geometry to create the effect of lighting. More info
See in Glossary.
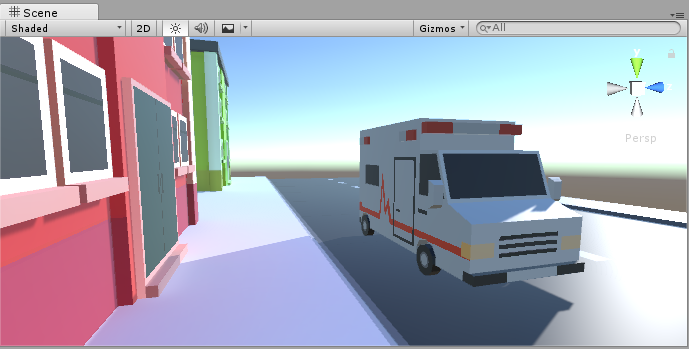
When you introduce moving objects into your scene, they do not automatically receive bounced light. In the below image, you can see the ambulance (a dynamic moving object) is not affected by the bounced red light coming off the building. Instead, its side is a flat grey color. This is because the ambulance is a dynamic object which can move around in the game, and therefore cannot use lightmaps, because they are static by nature. The scene needs Light Probes so that the moving ambulance can receive bounced light.
To use the light probe feature to cast bounced light onto dynamic moving objects, you must position light probes throughout your scene, so that they cover the areas of space that moving objects in your game might pass through.
The probes you place in your scene define a 3D volume. The lighting at any position within this volume is then approximated on moving objects by interpolating between the information baked into the nearest probes.
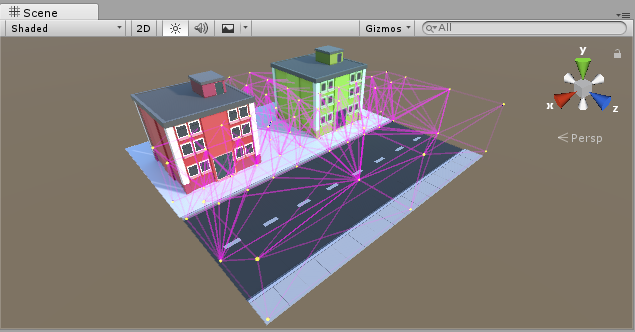
Once you have added probes, and baked the light in your scene, your dynamic moving objects will receive bounced light based on the nearest probes in the scene. Using the same example as above, the dynamic object (the ambulance) now receives bounced light from the static scenery, giving the side of the vehicle a red tint, because it is in front of the red building which is casting bounced light.
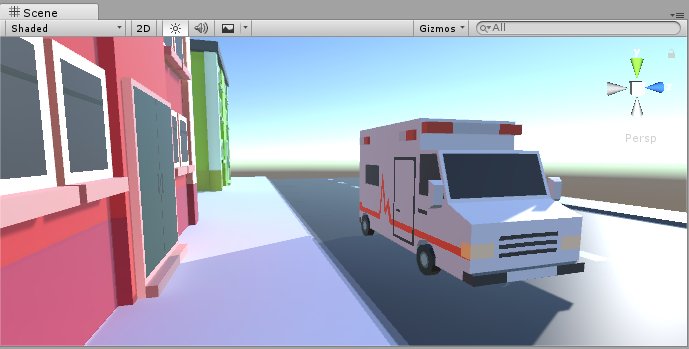
When a dynamic object is selected, the Scene viewAn interactive view into the world you are creating. You use the Scene View to select and position scenery, characters, cameras, lights, and all other types of Game Object. More info
See in Glossary will draw a visualisation of which light probes are being used for the interpolated bounced light. The nearest probes to the dynamic object are used to form a tetrahedral volume, and the dynamic object’s light is interpolated from the four points of this tetrahedron.
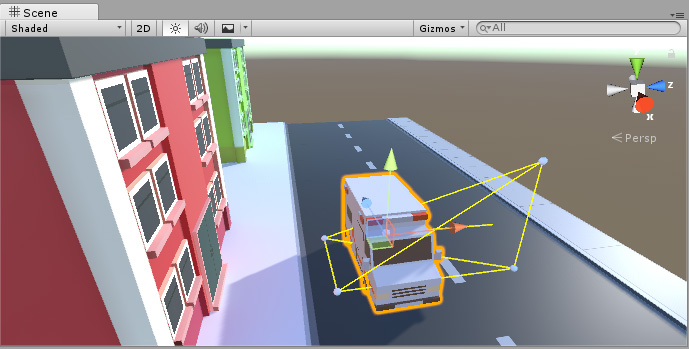
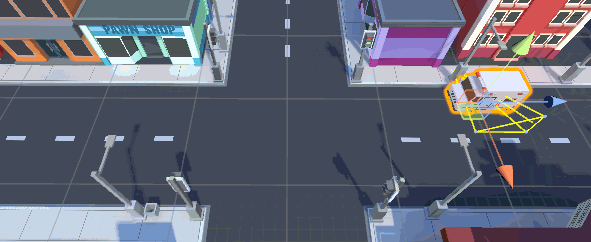
As an object passes through the scene, it moves from one tetrahedral volume to another, and the lighting is calculated based on its position within the current tetrahedron.
2017–06–08 Page published
Light Probes updated in 5.6