Configuring for Google Play Store
Introduction
This guide describes the process of establishing the digital records and relationships necessary for a Unity game to interact with an In-App Purchase Store. The Unity IAPAbbreviation of Unity In App Purchase
See in Glossary purchasing API is targeted.
In-App Purchase (IAP) is the process of transacting money for digital goods. A platform’s Store allows the purchase of Products, representing digital goods. These Products have an Identifier, typically of string datatype. Products have Types to represent their durability: subscription, consumable (capable of being rebought), and non-consumable (capable of being bought once) are the most common.
Google Play Store
Getting Started
Write a game implementing Unity IAP. See Unity IAP Initialization and the Sample IAP Project.
-
Keep the game’s product identifiers on-hand for Google Play Developer Console use later.

gold50 -
Build a signed non-Development Build Android APK from your game.
TIP: Make sure you safely store your keystore file. The original keystore is always required to update a published Google Play application.
TIP: Reuse the Bundle Version Code from your last uploaded APKThe Android Package format output by Unity. An APK is automatically deployed to your device when you select File > Build & Run. More info
See in Glossary during local testing to permit side-loading without first being required to upload the changed APK to the Developer Console. See the settings for the Android platform Player.
Register the Application
From the Google Account that will publish the game, register the Android application with the Google Play Developer Console.
NOTE: This guide uses the Google Play License Testing approach for testing in-app purchase integration.
-
Choose Create app.

All apps -
Give the application an App name and select the appropriate options for your game.
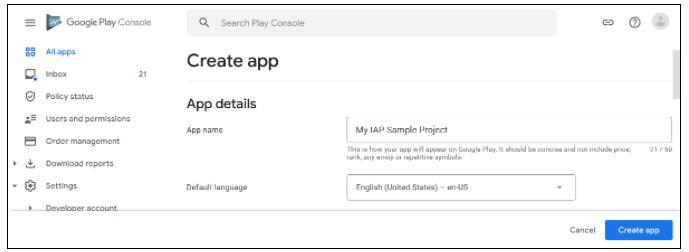
Create app -
Navigate to Testing/Closed testing in the left nav and choose Create track. Select your APK and upload it. Also complete the basic Dashboard requirements, upload screenshots and add a Short and Full description. You can also create an Internal test track.
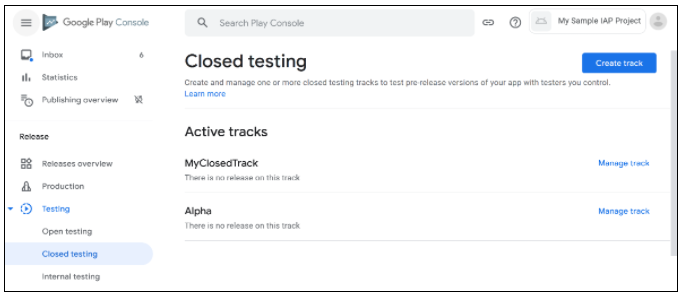
Closed testing
Add In-App Purchases
Now that you have uploaded our first binary, you can add the IAP products.
-
Navigate to In-app Products and choose Create product.
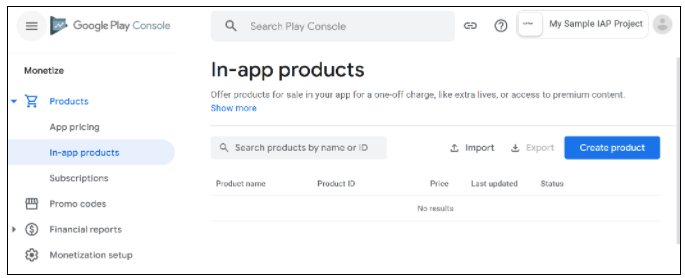
In-app products -
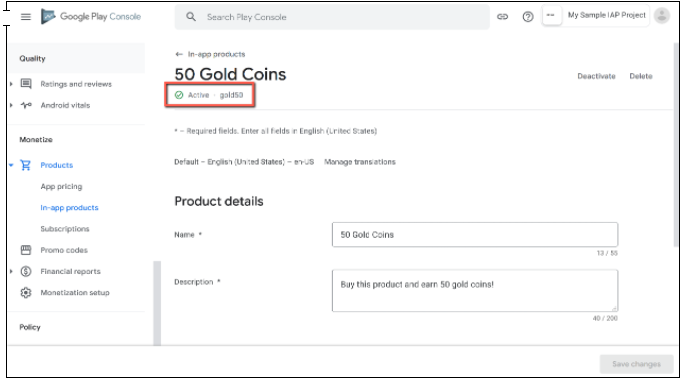
Define the Product ID , product details and price. Remember to activate the product after saving.
You can specify a consumable or non-consumable Product Type in Managed product. Subscription is also supported by Unity IAP.
NOTE: The “Product ID” here is the same identifier used in the game source code, added to the [Unity IAP ConfigurationBuilder] instance via AddProduct() or AddProducts(), like “gold50”.
Test IAP
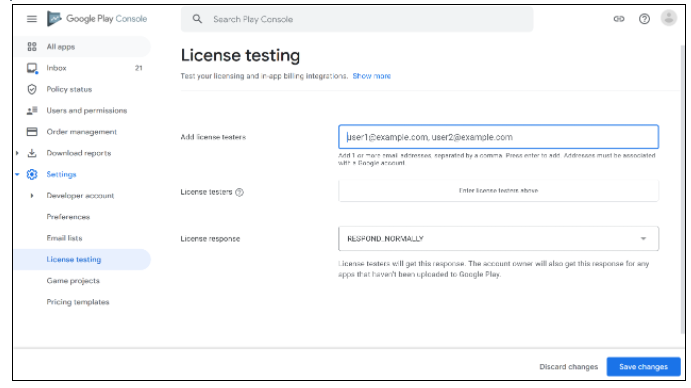
Add your testers to License Testing.
Navigate to All Apps on your Google Developer dashboard.
Select Settings/License Testing. Add each Google Account email address. Save changes.
NOTE: There may be a delay of several hours from the time you publish the APK.
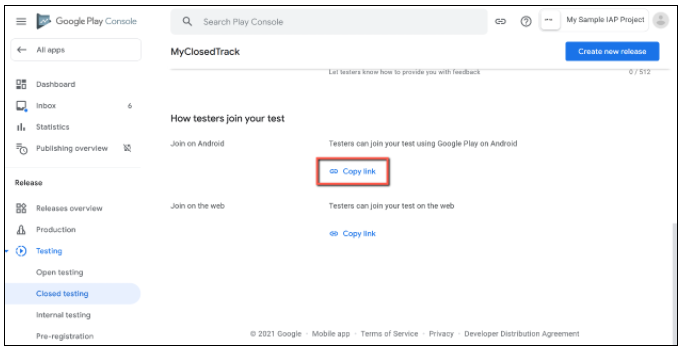
- When available, share the Join on Android link with testers. Ensure that testers can install the application from the store.
Note: To test updates retaining permission to purchase IAPS’s for free, you may side-load applications, updating the existing store-downladed APK install.
-
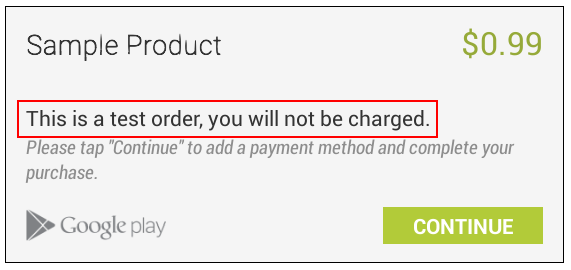
To test the IAP, make a purchase on a device logged in with a Tester Google Account. A modified purchase dialog box appears to confirm the fact this product is under test and is free.
WARNING: If this dialog box does not appear, then the Tester Google Account will be charged real money for the product.
