Create a custom style for a custom control
Version: 2023.2+
This example demonstrates how to use custom USS variables in a custom control.
Example overview
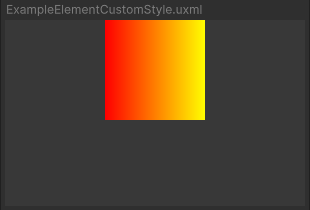
This example creates a custom control that reads two colors from USS and uses them to generate a texture.

You can find the completed files that this example creates in this GitHub repository.
Prerequisites
This guide is for developers familiar with the Unity Editor, UI(User Interface) Allows a user to interact with your application. Unity currently supports three UI systems. More info
See in Glossary Toolkit, and C# scripting. Before you start, get familiar with the following:
- UI Builder
- Visual TreeAn object graph, made of lightweight nodes, that holds all the elements in a window or panel. It defines every UI you build with the UI Toolkit.
See in Glossary - UXML
- USS
Create the custom control
Create a C# script to define the custom control and a USS file to define the custom style.
- Create a Unity project with any template.
- Create a folder named
create-custom-style-custom-controlto store your files. - In the
ExampleElementCustomStylefolder, create a C# script namedExampleElementCustomStyle.csand replace its contents with the following:
using UnityEngine;
using UnityEngine.UIElements;

namespace UIToolkitExamples
{
    [UxmlElement]
    public partial class ExampleElementCustomStyle : VisualElement
    {
        // Use CustomStyleProperty<T> to fetch custom style properties from USS
        static readonly CustomStyleProperty<Color> S_GradientFrom = new CustomStyleProperty<Color>("--gradient-from");
        static readonly CustomStyleProperty<Color> S_GradientTo = new CustomStyleProperty<Color>("--gradient-to");

        // Image child element and its texture
        Texture2D m_Texture2D;
        Image m_Image;

        public ExampleElementCustomStyle()
        {
            // Create an Image and a texture for it. Attach Image to self.
            m_Texture2D = new Texture2D(100, 100);
            m_Image = new Image();
            m_Image.image = m_Texture2D;
            Add(m_Image);

            RegisterCallback<CustomStyleResolvedEvent>(OnStylesResolved);
        }

        // When custom styles are known for this control, make a gradient from the colors.
        void OnStylesResolved(CustomStyleResolvedEvent evt)
        {
            Color from, to;

            if (evt.customStyle.TryGetValue(S_GradientFrom, out from)
                && evt.customStyle.TryGetValue(S_GradientTo, out to))
            {
                GenerateGradient(from, to);
            }
        }

        public void GenerateGradient(Color from, Color to)
        {
            for (int i = 0; i < m_Texture2D.width; ++i)
            {
                Color color = Color.Lerp(from, to, i / (float)m_Texture2D.width);
                for (int j = 0; j < m_Texture2D.height; ++j)
                {
                    m_Texture2D.SetPixel(i, j, color);
                }
            }

            m_Texture2D.Apply();
            m_Image.MarkDirtyRepaint();
        }
    }
}
Create the custom control and custom style
Create a USS file named ExampleElementCustomStyle.uss and replace its contents with the following:
ExampleElementCustomStyle {
    --gradient-from: red;
    --gradient-to: yellow;
}
Use the custom control in UI Document
Create a UI Document to use the custom control and apply the custom style to the custom control.
- In the
ExampleElementCustomStylefolder, create a UI Document namedExampleElementCustomStyle.uxml. - Double-click
ExampleElementCustomStyle.uxmlto open it in the UI Builder. - Select Library > Project > UIToolkitExamples, and drag ExampleElementCustomStyle to the Hierarchy window. A grey square appears in the Viewport window.
- Add the
ExampleElementCustomStyle.ussfile as an existing USS. This applies the custom USS variables to the square.