NavMesh Surface
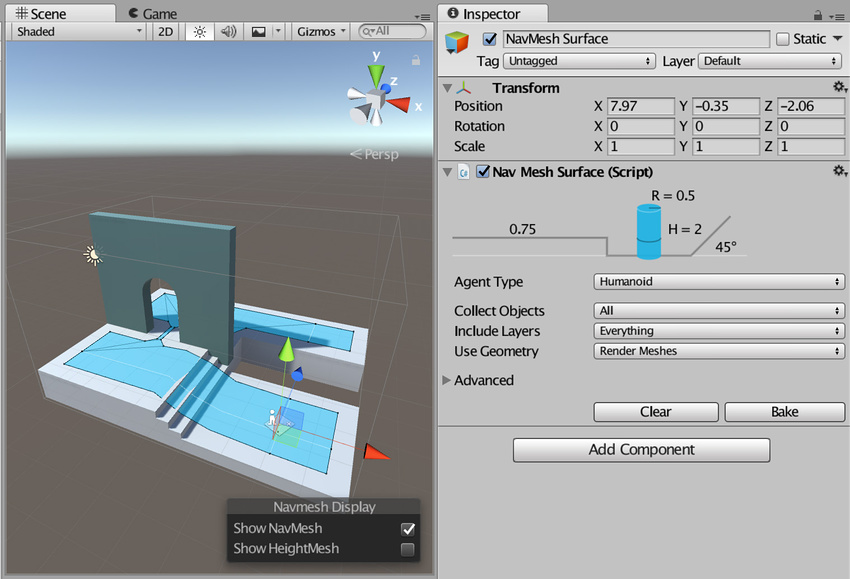
The NavMesh Surface component represents the walkable area for a specific NavMesh Agent type, and defines a part of the Scene where a NavMesh should be built.
The NavMesh Surface component is not in the standard Unity install; see documentation on high-level NavMesh building components for information on how to access it.
To use the NavMesh Surface component, navigate to GameObject > AI > NavMesh Surface. This creates an empty GameObject with a NavMesh Surface component attached to it. A Scene can contain multiple NavMesh Surfaces.
You can add the NavMesh Surface component to any GameObject. This is useful for when you want to use the GameObject parenting Hierarchy to define which GameObjects contribute to the NavMesh.

| Property | Function |
|---|---|
| Agent Type | The NavMesh Agent type using the NavMesh Surface. Use for bake settings and matching the NavMesh Agent to proper surfaces during pathfinding. - Humanoid - Ogre |
| Collect Objects | Defines which GameObjects to use for baking. - All – Use all active GameObjects (this is the default option). - Volume – Use all active GameObjects overlapping the bounding volume. - Children – Use all active GameObjects which are children of the NavMesh Surface component. |
| Include Layers | Define the layers on which GameObjects are included in the bake. In addition to Collect Objects, this allows for further exclusion of specific GameObjects from the bake (for example, effects or animated characters). This is set to Everything by default, but you can toggle following options on (denoted by a tick) or off individually: - Nothing (automatically unticks all other options, turning them off) - Everything (automatically ticks all other options, turning them on) - Default - TransparentFX - Ignore Raycast - Water - UI |
| Use Geometry | Select which geometry to use for baking. - Render Meshes – Use geometry from Render Meshes and Terrains. - Physics Colliders – Use geometry from Colliders and Terrains. Agents can move closer to the edge of the physical bounds of the environment with this option than they can with the Render Meshes option. |
Use the main settings for the NavMesh Surface component to filter the input geometry on a broad scale. Fine tune how Unity treats input geometry on a per-GameObject basis, using the NavMesh Modifier component.
The baking process automatically excludes GameObjects that have a NavMesh Agent or NavMesh Obstacle. They are dynamic users of the NavMesh, and so do not contribute to NavMesh building.
Advanced settings

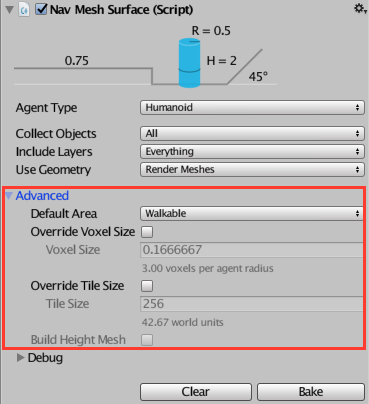
The Advanced settings section allows you to customize the following additional parameters:
| Property | Function |
|---|---|
| Default Area | Defines the area type generated when building the NavMesh. - Walkable (this is the default option) - Not Walkable - Jump Use the NavMesh Modifier component to modify the area type in more detail. |
| Override Voxel Size | Controls how accurately Unity processes the input geometry for NavMesh baking (this is a tradeoff inbetween speed and accuracy). Check the tickbox to enable. The default is unchecked (disabled). 3 voxels per Agent radius (6 per diameter) allows the capture of narrow passages, such as doors, while maintaining a quick baking time. For big open areas, using 1 or 2 voxels per radius speeds up baking. Tight indoor spots are better suited to smaller voxels, for example 4 to 6 voxels per radius. More than 8 voxels per radius does not usually provide much additional benefit. |
| Override Tile Size | In order to make the bake process parallel and memory efficient, the Scene is divided into tiles for baking. The white lines visible on the NavMesh are tile boundaries. The default tile size is 256 voxels, which provides a good tradeoff between memory usage and NavMesh fragmentation. To change this default tile size, check this tickbox and, in the Tile Size field, enter the number of voxels you want the Tile Size to be. The smaller the tiles, the more fragmented the NavMesh is. This can sometimes cause non-optimal paths. NavMesh carving also operates on tiles. If you have a lot of obstacles, you can often speed up carving by making the tile size smaller (for example around 64 to 128 voxels). If you plan to bake the NavMesh at runtime, using a smaller tile size to keep the maximum memory usage low. |
| Build Height Mesh | Not supported. |
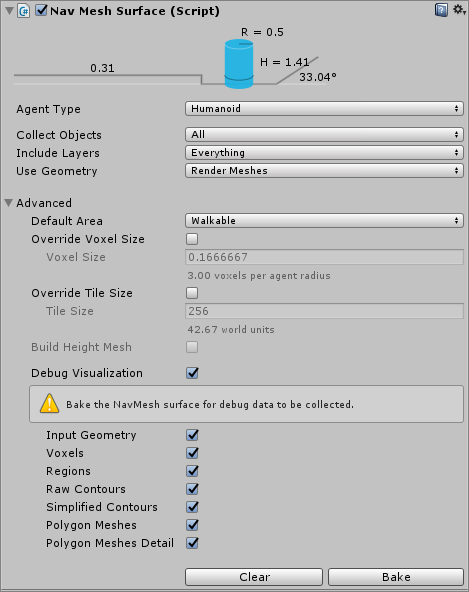
Advanced Debug Visualization


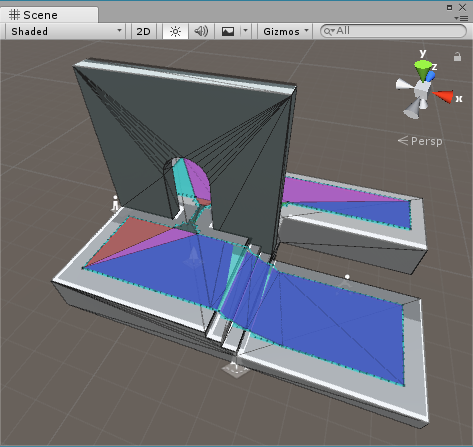
Use the settings in the Debug Visualization section to diagnose any problems encountered during the NavMesh building process. The different tickboxes show each step of the NavMesh building process, including input scene voxelization (Input Geometry), region splitting (Regions), contour generation (Contours) and the NavMesh polygons (Polygon Meshes).
2017–09–14 Page published with limited editorial review
New feature in 5.6
New Advanced Debug Visualization added in 2017.2 NewIn20172
Did you find this page useful? Please give it a rating: