9-slice your sprite
-
Select the Sprite in the Scene viewAn interactive view into the world you are creating. You use the Scene View to select and position scenery, characters, cameras, lights, and all other types of Game Object. More info
See in Glossary or the Hierarchy window. In the InspectorA Unity window that displays information about the currently selected GameObject, asset or project settings, allowing you to inspect and edit the values. More info
See in Glossary window, navigate to the Sprite RendererA component that lets you display images as Sprites for use in both 2D and 3D scenes. More info
See in Glossary component and change the Draw Mode property.It is set to Simple by default.
To apply 9-slicing, set it to either Sliced or Tiled depending on the behavior you want.
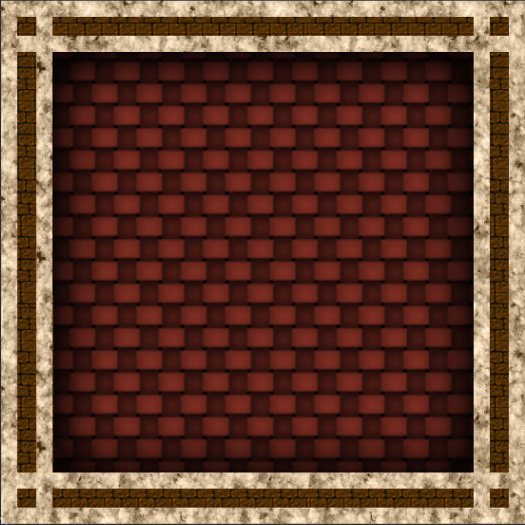
The following sections explain how each one behaves, using this Sprite:
Simple
This is the default Sprite Renderer behaviour. The image scales in all directions when its dimensions change. Simple is not used for 9-slicing.
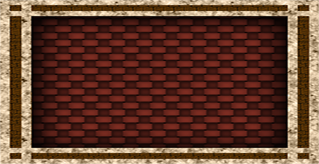
Sliced
In Sliced mode, the corners stay the same size, the top and bottom of the Sprite stretch horizontally, the sides of the Sprite stretch vertically, and the centre of the Sprite stretches horizontally and vertically to fit the Sprite’s size.
When a Sprite’s Draw Mode is set to Sliced, you can choose to change the size using the Size property on the Sprite Renderer or the Rect Transform Tool. You can still scale the Sprite using the Transform properties or the Transform Tool; however, the Transform scales the Sprite without applying the 9-slicing.
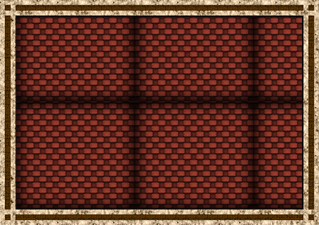
Tiled
In Tiled mode, the sprite stays the same size, and does not scale. Instead, the top and bottom of the Sprite repeat horizontally, the sides repeat vertically, and the centre of the Sprite repeats in a tile formation to fit the Sprite’s size.
When you set the Draw Mode to Tiled, an additional property called Tile Mode appears. See the next section in this page for more information on how Tile Mode works.
See documentation on the Sprite Renderer for full details on all of the component’s properties.
Tile Mode
When the Draw Mode is set to Tiled, use the Tile Mode property to control how the sections repeat when the dimensions of the Sprite change.
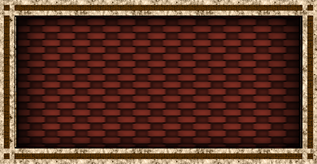
Continuous
Tile Mode is set to Continuous by default. When the size of the Sprite changes, the repeating sections repeat evenly in the Sprite.
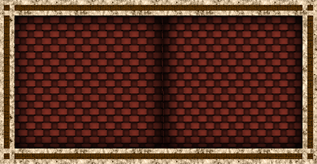
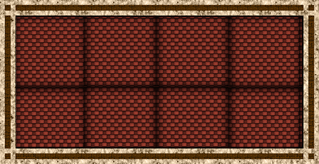
Adaptive
When Tile Mode is set to Adaptive, the repeating sections only repeat when the dimensions of the Sprite reach the Stretch Value.
Use the Stretch Value slider to set the value between 0 and 1. Note that 1 represents an image resized to twice its original dimensions, so if the Stretch Value is set at 1, the section repeats when the image is stretched to twice its original size.
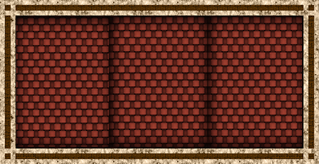
To demonstrate this, the following images show the difference between an image with the same dimension but a different Stretch Value:
Stretch Value 0.1:
Stretch Value 0.5:
9-slicing and Colliders
If your SpriteA 2D graphic objects. If you are used to working in 3D, Sprites are essentially just standard textures but there are special techniques for combining and managing sprite textures for efficiency and convenience during development. More info
See in Glossary has a Collider2D attached, you need to ensure that when you change the Sprite’s dimensions, the Collider2D changes with it.
Box Collider 2D and Polygon Collider 2D are the only Collider2D components in Unity that support 9-slicing. These two Collider2Ds have an Auto Tiling checkbox. To make sure the Collider2D components are set up for 9-slicing, select the Sprite you are applying it to, navigate to the Collider2D in the Inspector window, and tick the Auto Tiling checkbox. This enables automatic updates to the shape of the Collider2D, meaning that the shape is automatically readjusted when the Sprite’s dimensions change. If you don’t enable Auto Tiling, the Collider2D stays the same shape and size, even when the Sprite’s dimensions change.