Create a custom control with two attributes
Version: 2021.3+
This example demonstrates how to create a simple custom control with two attributes.
Example overview
This example creates a custom control called MyElement with two attributes and exposes it to UXML and UI Builder. This example also shows how to add the custom control to a UI in the UI Builder.
You can find the completed files that this example creates in this GitHub repository.
先决条件
This guide is for developers who are familiar with Unity, UI Toolkit, and C# scripting. Before you start, get familiar with the following:
Create the example
To create a new custom control class in C#, inherit it from the VisualElement class. This allows you to create and use this element in C#, but won’t automatically expose it in UXML and UI Builder. To expose it, define a traits class derived from UxmlTraits and override the Init().
Create a Unity project with any template.
-
In the
Assetsfolder, create a C# script namedMyElement.cswith the following content:using UnityEngine; using UnityEngine.UIElements; class MyElement : VisualElement { public new class UxmlFactory : UxmlFactory<MyElement, UxmlTraits> { } // Add the two custom UXML attributes. public new class UxmlTraits : VisualElement.UxmlTraits { UxmlStringAttributeDescription m_String = new UxmlStringAttributeDescription { name = "my-string", defaultValue = "default_value" }; UxmlIntAttributeDescription m_Int = new UxmlIntAttributeDescription { name = "my-int", defaultValue = 2 }; public override void Init(VisualElement ve, IUxmlAttributes bag, CreationContext cc) { base.Init(ve, bag, cc); var ate = ve as MyElement; ate.myString = m_String.GetValueFromBag(bag, cc); ate.myInt = m_Int.GetValueFromBag(bag, cc); } } // Must expose your element class to a { get; set; } property that has the same name // as the name you set in your UXML attribute description with the camel case format public string myString { get; set; } public int myInt { get; set; } } Create a UXML file with any name you want.
Double-click the UXML file to open it in the UI Builder.
In the Library section of the UI Builder, select Project > Custom Controls (C#) > MyElement.
Drag MyElement to the Hierarchy window.
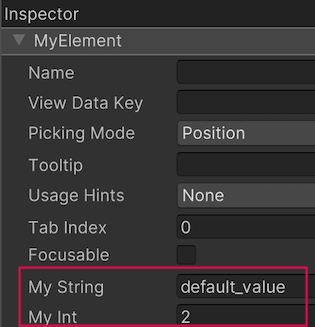
To see the custom attributes for MyElement, go to the Inspector window of MyElement: