- Unity User Manual 2023.1
- Unity Services
- Unity IAP
- Unity IAP の設定
- Apple App Store と Mac App Store の設定
Apple App Store と Mac App Store の設定
前書き
ここでは、Unity のゲームでアプリ内課金ストアを利用するのに必要な、デジタルレコードと関連を構築する手順を説明します。Unity IAP 課金 API がターゲットとなります。
アプリ内課金 (IAP) は、お金とデジタルプロダクトとを取引する過程です。プラットフォームのストアでは、デジタルプロダクトである製品を購入することが可能です。プロダクトには、たいてい文字列データタイプである ID と、有効な期間を表すタイプが与えられています。タイプは、subscription、 consumable (再購入可能)、 non-consumable (1度だけ購入可能) が一般的です。
Apple App Store
はじめに
Unity IAP を実装するゲームを作成します。Unity IAP 初期化 を参照してください。
-
後で、iTunes Connect で使用するために、手元にゲームのプロダクト ID を控えておきます。

アプリケーションの登録
Apple Developer Center で、該当する ID セクションを探します。
-
新しい App ID を加え、Apple の基本アプリケーション情報を作成します。
ノート: Explicit App ID を使用してください。Wildcard App ID (com.example.*) は、In-App Purchases を利用するアプリケーションには使用できません。
注意 App ID は Developer Center で作成したあとに iTunes Connect で使用できます。
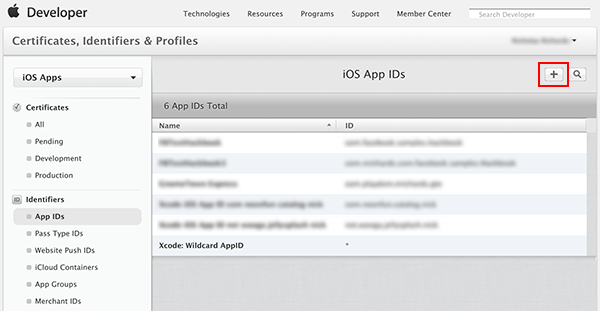
-
iTunes Connect を開き、App を作成し、ゲームとストアとの関連付けをします。
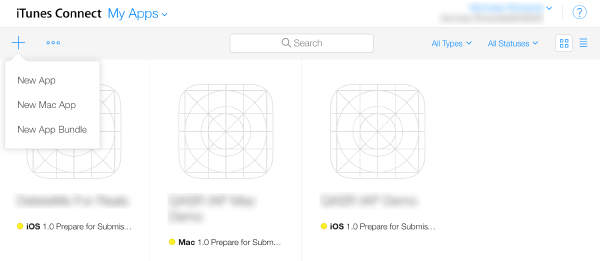
-
新しく作成した App ID をアプリケーションの Bundle ID に使用します。
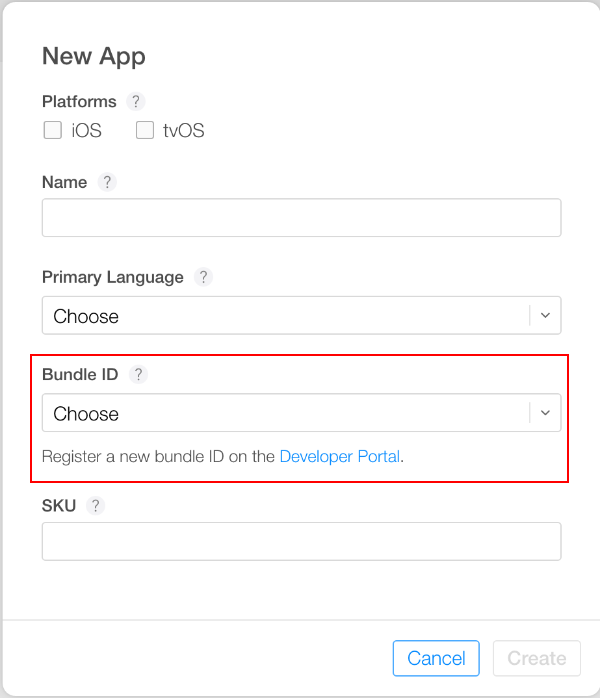
アプリ内課金システム情報の追加
-
新しいアプリの Features を選択し、+ ボタンを押して新しい In-App Purchase を加えます。
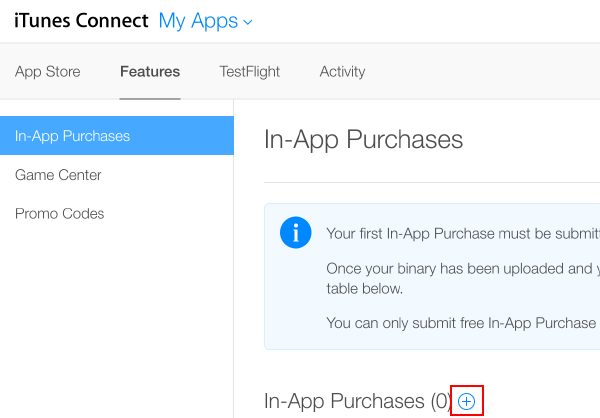
-
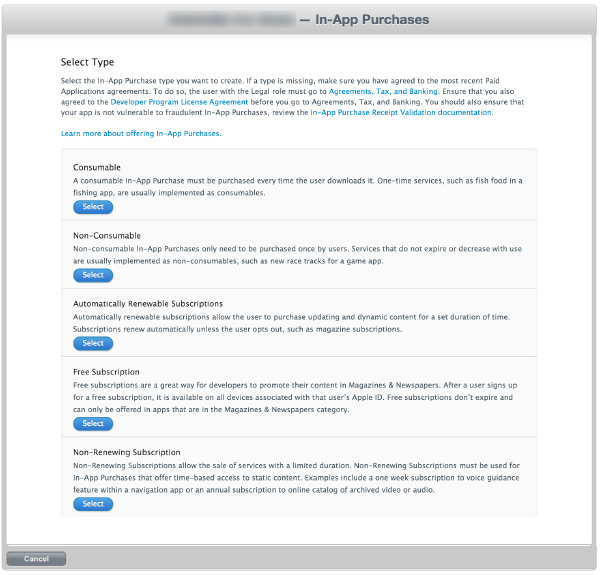
プロダクトタイプ を選択します。
-
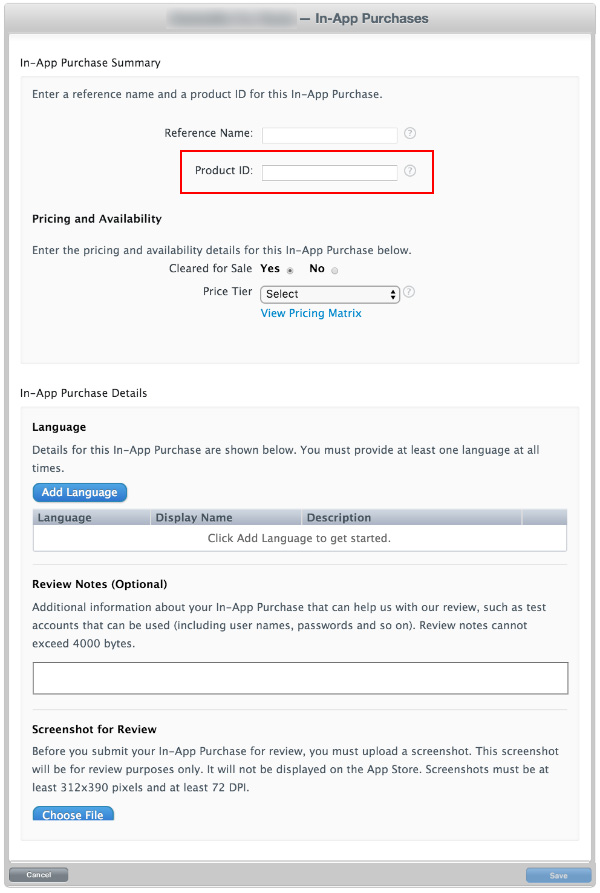
Product ID を 指定し、必要に応じて他のフィールドを記入します。
ノート: この “Product ID” は、ゲームのソースコードで使用され AddProduct() や AddProducts() を通じて Unity IAP ConfigurationBuilder インスタンスに加えられる ID と同じです。
ノート: 複数の Apple デバイスのグループをターゲットにするとき (例えば、iOS と Mac 両方を出荷するときなど)、Apple はそれぞれの異なるグループが区別できるよう固有のプロダクト ID を必須としています。Unity IAP の Purchasing.IDs クラスを使用して、“1 から複数” にマップするプロダクト ID をストア固有の ID に定義し、IAP を初期化するときにそのマッピングを渡します。
-
結果

IAP のテスト
-
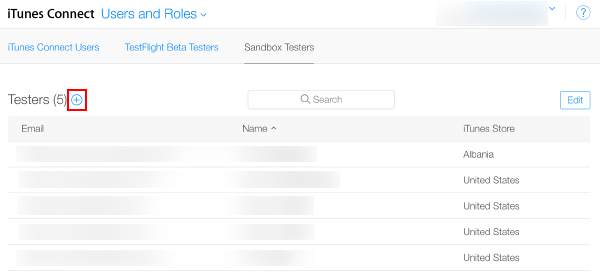
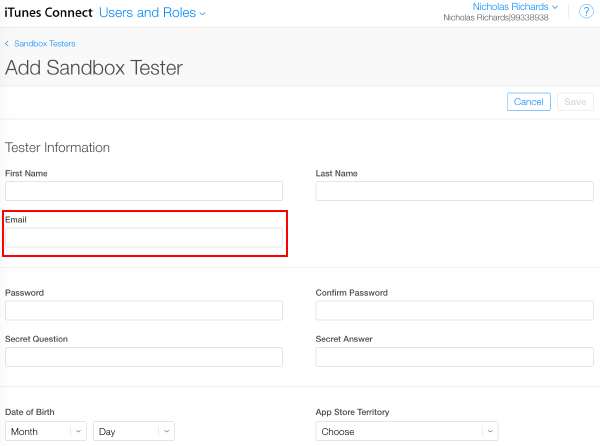
iTunes Connect で、テスト機器の iTunes アカウントで使用する Sandbox Testers を作成します。これを行うには、iTunes Connect > Users and Roles の順に選択し、プラス (+) ボタンを選択します。いくつか重要な注意事項の追加があるので、必ず Apple’s Sandbox Tester documentation を参照してください。Tester を作成するには、実在の メールアドレスを使用してください。
ノート: 詳細については、iOS & Mac App Store を参照してください。
ヒント: メールアドレスの管理を簡易化するためには、Gmail、iCloud、Outlook.com などのようなサブアドレス (メールアカウント+サブアドレス@example.com) の使用が可能なメールサービスを使用します。これにより、1 つのメールアカウントで複数のサブアドレスのメールを取得することが可能になります。
-
ユーザー作成ウィザードを完了します。
-
Unity を使用して、ゲームの Xcode プロジェクトをビルドします。
ノート: Unity でバンドル ID を確認すると (Edit > Project Settings を選択し、Other Settings カテゴリを選択し Bundle Identifier セクションに移動します)、iTunes Connect で使用されているものと一致します。
-
ゲームの Xcode プロジェクトで、Team (Project Navigator > your game Target > General > Identity > Team) が Apple Developer アカウントに設定されていることを確認してください。
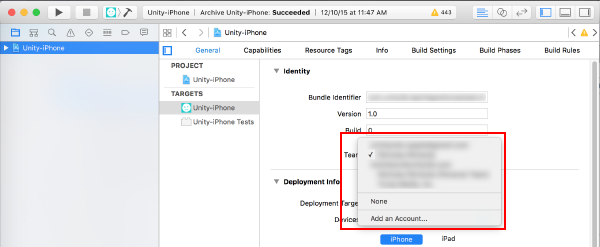
iOS の場合
-
ターゲットになる iOS デバイスを使って、存在する Apple ID アカウントすべてからサインアウトし、アプリケーションの指示で Sandbox Tester としてサインインします。その後の購入はすべて、Production Store ではなく Apple Sandbox を通して送られます。
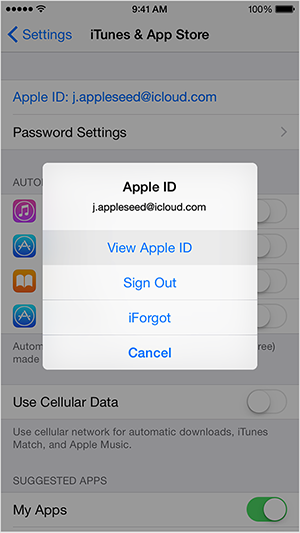
iOS デバイスでゲームをビルドして実行します。すべてが正しく設定されると、
UnityPurchasing.Initialize()へと続きます。-
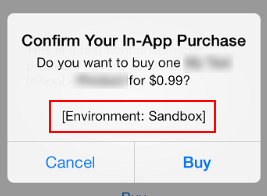
デバイス上のゲームでなにかを購入して、IAP をテストします。変更された購入ダイアログが表示され、この購入が実際、Sandbox 環境で実行されたとことを示します。購入の際に、パスワードの入力をもとめられたら、Sandbox User Tester のパスワードを使用してください。
注意: 表示が出ない場合は、プロダクトに対し実際に課金されます。
Mac の場合
デスクトップのMacビルドをビルドする場合は、UnityのMac Player 設定で Mac App Store Validation を選択します。
アプリケーションのビルド後に、バンドル ID とバージョン文字列で
info.plistファイルを更新します。.app ファイルを右クリックし、 Show Package Contents を選択し、info.plistファイルを探し、CFBundleIdentifier文字列をアプリケーションのバンドル ID で更新します。-
アプリケーションに署名し、パッケージし、インストールします。your.app と your.pkg を適切に入力し、以下のコマンドを OSX ターミナルから実行します。
ヒント: バンドルに署名するには、Contents.meta ファイルが存在する場合、最初にそれを削除する必要があります。
your.app/Contents/Plugins/unitypurchasing.bundle/Contents.metacodesign -f --deep -s "3rd Party Mac Developer Application: " your.app/Contents/Plugins/unitypurchasing.bundlecodesign -f --deep -s "3rd Party Mac Developer Application: " your.appproductbuild --component your.app /Applications --sign "3rd Party Mac Developer Installer: " your.pkg
パッケージを正しくインストールするために、新しく作成したパッケージを実行してインストールする前にアンパックした .app ファイルを削除してください。
アプリケーション フォルダーからアプリを起動します。初回に iTunes アカウントの情報を入力すると、Sandbox 環境でテスト購入できるようになります。
Apple の App Store のテストと署名の詳細については、iOS および Mac の拡張機能 と macOS アプリケーションのビルド を参照してください。