IMGUI 확장
IMGUI 시스템을 활용하고 확장하여 요구 사항을 충족할 수 있는 다양한 방법이 있습니다. 컨트롤을 혼합하여 만들 수 있으며 GUI에 대한 사용자 입력을 처리하는 방법을 결정할 수 있습니다.
복합 컨트롤
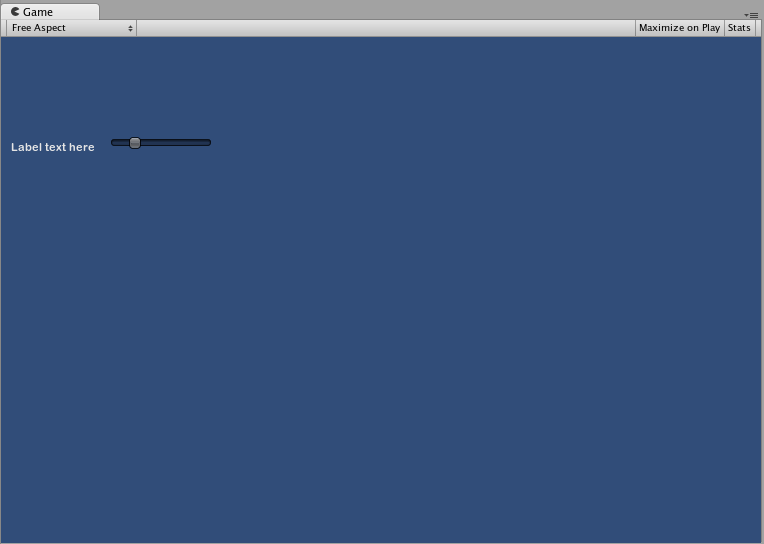
GUI에서 두 컨트롤 유형이 항상 동시에 나타나는 경우가 있습니다. 예를 들어, 캐릭터 생성 화면을 제작하는 경우 여러 개의 수평 슬라이더가 필요할 것입니다. 각각의 슬라이더는 식별할 레이블이 필요합니다. 플레이어가 어떤 값을 조정하는지 알아야하기 때문입니다. 이 경우, GUI.Label() 에 대한 모든 호출을 GUI.HorizontalSlider() 에 할당하거나, 레이블과 슬라이더를 동시에 포함하는 Compound Control 을 생성하면 됩니다.
/* Label and Slider Compound Control */


// JavaScript
var mySlider : float = 1.0;

function OnGUI () {
    mySlider = LabelSlider (Rect (10, 100, 100, 20), mySlider, 5.0, "Label text here");
}

function LabelSlider (screenRect : Rect, sliderValue : float, sliderMaxValue : float, labelText : String) : float {
    GUI.Label (screenRect, labelText);
    screenRect.x += screenRect.width; // <- Push the Slider to the end of the Label
    sliderValue = GUI.HorizontalSlider (screenRect, sliderValue, 0.0, sliderMaxValue);
    return sliderValue;
}


// C#
using UnityEngine;
using System.Collections;

public class GUITest : MonoBehaviour {

    private float mySlider = 1.0f;

    void OnGUI () {
        mySlider = LabelSlider (new Rect (10, 100, 100, 20), mySlider, 5.0f, "Label text here");
    }

    float LabelSlider (Rect screenRect, float sliderValue, float sliderMaxValue, string labelText) {
        GUI.Label (screenRect, labelText);

        // <- Push the Slider to the end of the Label
        screenRect.x += screenRect.width;

        sliderValue = GUI.HorizontalSlider (screenRect, sliderValue, 0.0f, sliderMaxValue);
        return sliderValue;
    }

}
이 예제에서 LabelSlider() 를 호출하고 올바른 인수를 전달하면 수평 슬라이더와 짝을 이루는 레이블이 제공됩니다. 복합 컨트롤을 작성할 때 함수의 마지막에 올바른 값을 반환하여 대화형으로 만들어야 합니다.

정적 복합 컨트롤
Static 함수를 사용하여 복합 컨트롤의 전체 컬렉션을 만들 수 있습니다. 이 방법을 사용하면 사용하려는 동일한 스크립트에서 함수를 선언할 필요가 없습니다.
/* This script is called CompoundControls */


// JavaScript
static function LabelSlider (screenRect : Rect, sliderValue : float, sliderMaxValue : float, labelText : String) : float {
    GUI.Label (screenRect, labelText);
    screenRect.x += screenRect.width; // <- Push the Slider to the end of the Label
    sliderValue = GUI.HorizontalSlider (screenRect, sliderValue, 0.0, sliderMaxValue);
    return sliderValue;
}


// C#
using UnityEngine;
using System.Collections;

public class CompoundControls : MonoBehaviour {

    public static float LabelSlider (Rect screenRect, float sliderValue, float sliderMaxValue, string labelText) {
        GUI.Label (screenRect, labelText);

        // <- Push the Slider to the end of the Label
        screenRect.x += screenRect.width;

        sliderValue = GUI.HorizontalSlider (screenRect, sliderValue, 0.0f, sliderMaxValue);
        return sliderValue;
    }

}
위의 예제를 CompoundControls 라는 스크립트에 저장함으로써 CompoundControls.LabelSlider() 를 입력하고 인수를 제공하기만 하면 다른 스크립트에서 LabelSlider() 함수를 호출할 수 있습니다.
정교한 복합 컨트롤
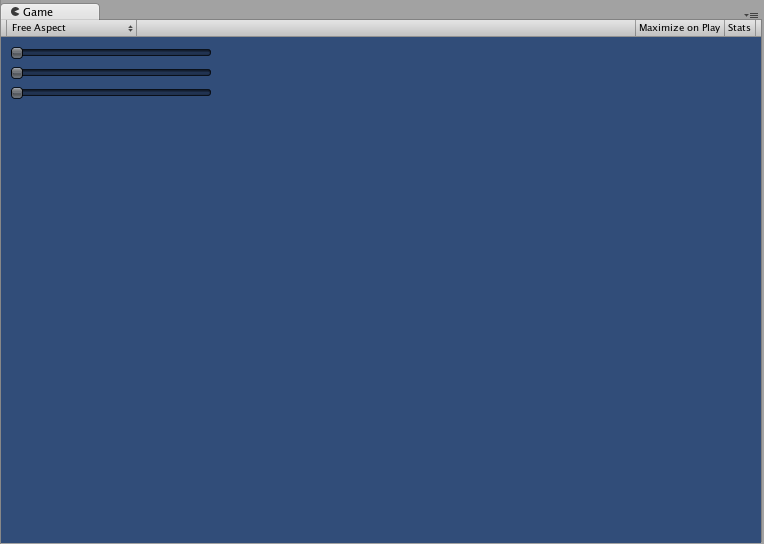
복합 컨트롤로 매우 독창적으로 만들 수 있습니다. 원하는 방식으로 정렬하고 그룹화할 수 있습니다. 다음 예제에서는 재사용 가능한 RGB 슬라이더를 만듭니다.
/* RGB Slider Compound Control */


// JavaScript
var myColor : Color;

function OnGUI () {
    myColor = RGBSlider (Rect (10,10,200,10), myColor);
}

function RGBSlider (screenRect : Rect, rgb : Color) : Color {
    rgb.r = GUI.HorizontalSlider (screenRect, rgb.r, 0.0, 1.0);
    screenRect.y += 20; // <- Move the next control down a bit to avoid overlapping
    rgb.g = GUI.HorizontalSlider (screenRect, rgb.g, 0.0, 1.0);
    screenRect.y += 20; // <- Move the next control down a bit to avoid overlapping
    rgb.b = GUI.HorizontalSlider (screenRect, rgb.b, 0.0, 1.0);
    return rgb;
}


// C#
using UnityEngine;
using System.Collections;

public class GUITest : MonoBehaviour {

    public Color myColor;

    void OnGUI () {
        myColor = RGBSlider (new Rect (10,10,200,10), myColor);
    }

    Color RGBSlider (Rect screenRect, Color rgb) {
        rgb.r = GUI.HorizontalSlider (screenRect, rgb.r, 0.0f, 1.0f);

        // <- Move the next control down a bit to avoid overlapping
        screenRect.y += 20;
        rgb.g = GUI.HorizontalSlider (screenRect, rgb.g, 0.0f, 1.0f);

        // <- Move the next control down a bit to avoid overlapping
        screenRect.y += 20;

        rgb.b = GUI.HorizontalSlider (screenRect, rgb.b, 0.0f, 1.0f);
        return rgb;
    }
}

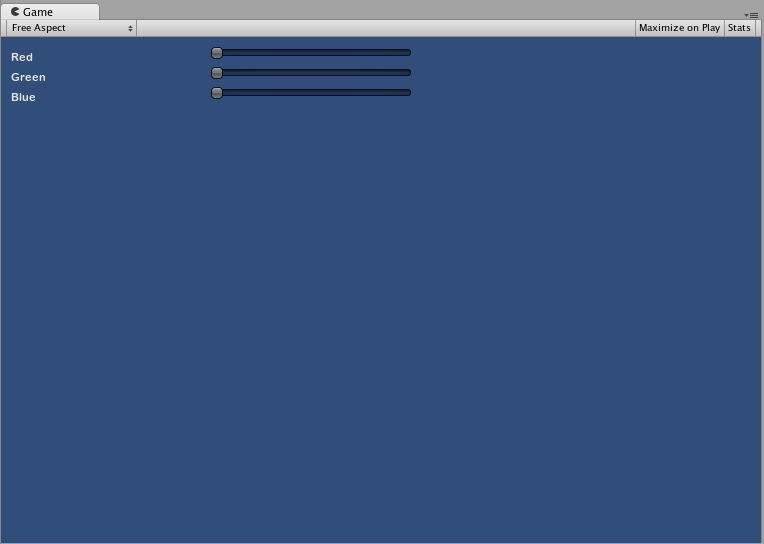
이제 복합 컨트롤 안에 다른 복합 컨트롤을 사용할 수 있다는 점을 알아보기 위해, 복합 컨트롤 안에 다른 복합 컨트롤을 빌드해볼 것입니다. 위의 슬라이더와 비슷한 새로운 RGB 슬라이더를 만들 것인데, LabelSlider를 사용할 것입니다. 이렇게 하면 어떤 슬라이더가 어떤 컬러에 해당하는지 알려주는 레이블이 항상 존재하게 됩니다.
/* RGB Label Slider Compound Control */


// JavaScript
var myColor : Color;

function OnGUI () {
    myColor = RGBLabelSlider (Rect (10,10,200,20), myColor);
}

function RGBLabelSlider (screenRect : Rect, rgb : Color) : Color {
    rgb.r = CompoundControls.LabelSlider (screenRect, rgb.r, 1.0, "Red");
    screenRect.y += 20; // <- Move the next control down a bit to avoid overlapping
    rgb.g = CompoundControls.LabelSlider (screenRect, rgb.g, 1.0, "Green");
    screenRect.y += 20; // <- Move the next control down a bit to avoid overlapping
    rgb.b = CompoundControls.LabelSlider (screenRect, rgb.b, 1.0, "Blue");
    return rgb;
}


// C#
using UnityEngine;
using System.Collections;

public class GUITest : MonoBehaviour {

    public Color myColor;

    void OnGUI () {
        myColor = RGBSlider (new Rect (10,10,200,30), myColor);
    }

    Color RGBSlider (Rect screenRect, Color rgb) {
        rgb.r = CompoundControls.LabelSlider (screenRect, rgb.r, 1.0f, "Red");

        // <- Move the next control down a bit to avoid overlapping
        screenRect.y += 20;
        rgb.g = CompoundControls.LabelSlider (screenRect, rgb.g, 1.0f, "Green");

        // <- Move the next control down a bit to avoid overlapping
        screenRect.y += 20;

        rgb.b = CompoundControls.LabelSlider (screenRect, rgb.b, 1.0f, "Blue");

        return rgb;
    }

}
