큐브맵 배열
큐브맵 배열은 크기와 포맷이 같고 GPU가 단일 텍스처 리소스로 액세스할 수 있는 큐브맵의 배열입니다. 큐브맵 배열은 종종 효율적인 반사 프로브, 조명 및 그림자 시스템을 구현하는 데 사용됩니다.
Unity 프로젝트에서 Unity 에디터는 큐브맵 배열을 텍스처 에셋으로 나타냅니다. 텍스처 에셋의 임포트 설정을 구성하려면 인스펙터를 사용하거나, TextureImporter API를 사용하는 스크립트를 작성할 수 있습니다. Unity 엔진에서 Unity는 CubemapArray 클래스를 사용하여 큐브맵 배열을 나타냅니다.
큐브맵 배열 생성
프로젝트에서 큐브맵 배열을 생성하려면 스크립트를 사용해야 합니다.
다음 예제는CubemapArray 클래스의 인스턴스를 생성하여 컬러 데이터로 채운 후 프로젝트에 텍스처 에셋으로 저장하는 에디터 스크립트입니다.
using UnityEngine;
public class CreateCubeArrayTexture : MonoBehaviour
{
    [UnityEditor.MenuItem("CreateExamples/CubemapArray")]
    static void CreateCubemapArray()
    {
        // Configure the cubemap array and color data
        int faceSize = 16;
        int arraySize = 4;
        int[] kCubeXRemap = new int[] { 2, 2, 0, 0, 0, 0 };
        int[] kCubeYRemap = new int[] { 1, 1, 2, 2, 1, 1 };
        int[] kCubeZRemap = new int[] { 0, 0, 1, 1, 2, 2 };
        float[] kCubeXSign = new float[] { -1.0F, 1.0F, 1.0F, 1.0F, 1.0F, -1.0F };
        float[] kCubeYSign = new float[] { -1.0F, -1.0F, 1.0F, -1.0F, -1.0F, -1.0F };
        float[] kCubeZSign = new float[] { 1.0F, -1.0F, 1.0F, -1.0F, 1.0F, -1.0F };
        var baseCols = new Color[] { Color.white, new Color(1, .5f, .5f, 1), new Color(.5f, 1, .5f, 1), new Color(.5f, .5f, 1, 1), Color.gray };

        // Create an instance of CubemapArray
        var tex = new CubemapArray(faceSize, arraySize, TextureFormat.ARGB32, true);
        tex.filterMode = FilterMode.Trilinear;

        // Iterate over each cubemap
        var col = new Color[tex.width * tex.width];
        float invSize = 1.0f / tex.width;
        for (var i = 0; i < tex.cubemapCount; ++i)
        {
            var baseCol = baseCols[i % baseCols.Length];

            // Iterate over each face of the current cubemap
            for (var face = 0; face < 6; ++face)
            {
                var idx = 0;
                Vector3 signScale = new Vector3(kCubeXSign[face], kCubeYSign[face], kCubeZSign[face]);

                // Iterate over each pixel of the current face
                for (int y = 0; y < tex.width; ++y)
                {
                    for (int x = 0; x < tex.width; ++x)
                    {
                        // Calculate a "normal direction" color for the current pixel
                        Vector3 uvDir = new Vector3(x * invSize * 2.0f - 1.0f, y * invSize * 2.0f - 1.0f, 1.0f);
                        uvDir = uvDir.normalized;
                        uvDir.Scale(signScale);
                        Vector3 dir = Vector3.zero;
                        dir[kCubeXRemap[face]] = uvDir[0];
                        dir[kCubeYRemap[face]] = uvDir[1];
                        dir[kCubeZRemap[face]] = uvDir[2];

                        // Shift the color into the 0.4..1.0 range
                        Color c = new Color(dir.x * 0.3f + 0.7f, dir.y * 0.3f + 0.7f, dir.z * 0.3f + 0.7f, 1.0f);

                        // Add a pattern to some pixels, so that mipmaps are more clearly visible
                        if (((x ^ y) & 3) == 1)
                            c *= 0.5f;

                        // Tint the color with the baseCol tint
                        col[idx] = baseCol * c;
                        ++idx;
                    }
                }

                // Copy the color values for this face to the texture
                tex.SetPixels(col, (CubemapFace)face, i);
            }
        }

        // Apply the changes to the texture and upload the updated texture to the GPU
        tex.Apply();

        // Save the texture to your Unity Project
        AssetDatabase.CreateAsset(tex, "Assets/ExampleCubemapArray.asset");
        UnityEditor.AssetDatabase.SaveAssets();
    }
}
큐브맵 배열 미리보기
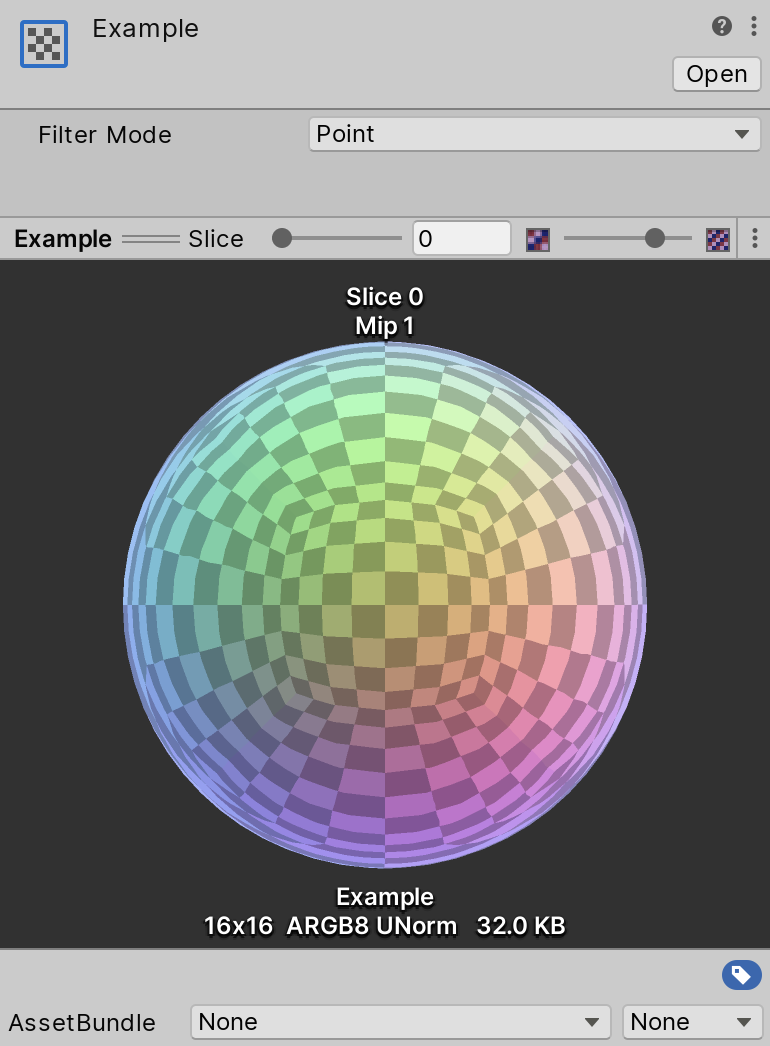
인스펙터 창에서 큐브맵 배열을 미리 보려면 프로젝트 창으로 이동하여 텍스처 에셋을 선택하십시오. 그러면 이 텍스처 에셋의 텍스처 임포트 설정이 인스펙터에 표시되고, Unity는 인스펙터 하단에 큐브맵 배열의 미리보기를 렌더링합니다.

다음 컨트롤을 툴바에서 이용할 수 있습니다.
| 컨트롤 | 기능 |
|---|---|
| Filter Mode | 미리보기에 사용할 필터링입니다. 필터 모드 문서를 참조하십시오. |
셰이더에서 큐브맵 배열 사용
다음은 큐브맵 배열을 사용하는 셰이더의 예제입니다.
Shader "CubemapArrayShaderExample" {
Properties {
    _MainTex ("CubemapArray", CubeArray) = "" {}
    _Mip ("Mip", Float) = 0.0
    _Intensity ("Intensity", Float) = 1.0
    _SliceIndex ("Slice", Int) = 0
    _Exposure ("Exposure", Float) = 0.0
}

SubShader {
    Tags {"Queue"="Transparent" "IgnoreProjector"="True" "RenderType"="Transparent" "ForceSupported" = "True"}

    Pass {

        CGPROGRAM
        #pragma vertex vert
            #pragma fragment frag
            #pragma require sampleLOD
            #pragma require cubearray
            #include "UnityCG.cginc"


            struct appdata {
                float4 pos : POSITION;
                float3 nor : NORMAL;
            };

            struct v2f {
                float3 uv : TEXCOORD0;
                float4 pos : SV_POSITION;
            };

            uniform int _SliceIndex;
            float _Mip;
            half _Alpha;
            half _Intensity;
            float _Exposure;

           v2f vert (appdata v) {
                v2f o;
                o.pos = UnityObjectToClipPos(v.pos);
                float3 viewDir = -normalize(ObjSpaceViewDir(v.pos));
                o.uv = reflect(viewDir, v.nor);
                return o;
            }

            half4 _MainTex_HDR;
            UNITY_DECLARE_TEXCUBEARRAY(_MainTex);
            fixed4 frag (v2f i) : COLOR0
            {
                fixed4 c = UNITY_SAMPLE_TEXCUBEARRAY(_MainTex, float4(i.uv, _SliceIndex));
                fixed4 cmip = UNITY_SAMPLE_TEXCUBEARRAY_LOD(_MainTex, float4(i.uv, _SliceIndex), _Mip);
                if (_Mip >= 0.0)
                    c = cmip;
                c.rgb = DecodeHDR (c, _MainTex_HDR) * _Intensity;
                c.rgb *= exp2(_Exposure);
                c = lerp (c, c.aaaa, _Alpha);
                return c;
            }
            ENDCG
        }
    }
    Fallback Off
}
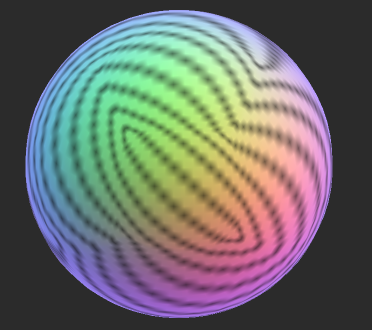
이 셰이더를 페이지 상단의 예제에서 생성된 큐브맵 배열과 함께 사용하면 다음의 결과를 얻을 수 있습니다.

2020.1에서 [큐브맵 배열 지원] 추가됨 NewIn20201