- Unity User Manual (5.6)
- 스크립팅
- 스크립팅 툴
- Unity Test Runner
Unity Test Runner
Unity Test Runner는 편집 모드와 플레이 모드에서 코드를 테스트하는 툴이며 스탠드얼론, Android, iOS와 같은 타겟 플랫폼에서도 사용 가능합니다.
Unity Test Runner는 Window > __Test Runner__에서 액세스할 수 있습니다.
Unity Test Runner는 NUnit 라이브러리의 Unity 통합을 사용하며 이는 .NET 언어용 오픈소스 유닛 테스트 라이브러리입니다. NUnit에 대한 자세한 정보는 공식 NUnit 웹사이트 및 NUnit GitHub 문서화를 참조하십시오.
UnityTestAttribute는 Unity Test Runner용 메인 추가 사항입니다. 테스트에서 프레임을 스킵할 수 있게 해주는 유닛 테스트 타입으로 백그라운드 작업으로 끝낼 수 있습니다. 플레이 모드로 실행 중일 때 UnityTestAttribute를 코루틴으로 실행하거나 편집 모드로 실행 중일 때 EditorApplication.update 콜백 루프로 실행해야 합니다.
Known issues and limitations
다음은 Unity Test Runner의 알려진 문제점과 제약 사항입니다.
UnityTestAttribute는 WebGL과 WSA 플랫폼에서 지원되지 않습니다.테스트 러너는 현재 AOT 플랫폼을 지원하지 않습니다.
파라미터 테스트가
UnityTest에서 지원되지 않습니다(ValueSource 제외).플랫폼 플레이어(스탠드얼론, Android, iOS)에서 커맨드 라인을 통한 자동 테스트는 현재 지원되지 않습니다.
EditMode 테스트 중일 때 이를 저장할 Editor 폴더를 만들어야 합니다.
How to use Unity Test Runner
이 페이지의 문서는 구독자가 유닛 테스트와 NUnit에 대한 기본 지식이 있음을 예상하고 작성됐습니다. NUnit이 처음이시거나 더 많은 정보를 알고 싶으시다면 NUnit GitHub 문서를 참조하십시오.
Unity Test Runner를 사용하려면 Test Runner 창을 열고 Window > __Test Runner__로 이동해야 합니다.

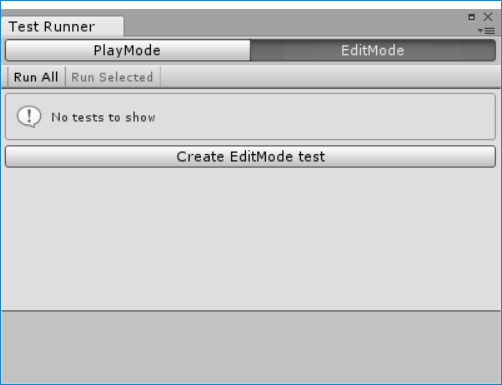
프로젝트에 테스트가 없다면 __Create EditMode test__를 클릭해서 베이직 테스트 스크립트를 생성할 수 있습니다.
Assets > Create > Testing__에서 EditMode Test C# Script__ 또는 __PlayMode Test C# Script__를 선택해도 테스트 스크립트를 생성할 수 있습니다.
Testing in Edit mode
편집 모드에서 Test Runner 창에서 실행되는 테스트는 위의 스크린샷처럼 표시됩니다.
EditMode 버튼을 선택하고 Create EditMode test 버튼을 클릭해서 베이직 테스트 스크립트를 생성해야 합니다. 이를 MonoDevelop 또는 필요하다면 선호하는 통합 개발 환경(IDE)에서 열고 편집해야 합니다.
Execute UnityTestAttribute in the `EditorApplication.update callback loop when running in Edit mode.
Testing in Play mode
플레이 모드에서 Unity Test Runner를 사용하기 전에 Test Runner 창에서 활성화해야 합니다.
이 작업을 수행하는 방법은 다음과 같습니다.
Window > __Test Runner__로 이동합니다.
PlayMode 버튼을 클릭합니다.
Click the Enable playmode tests button.
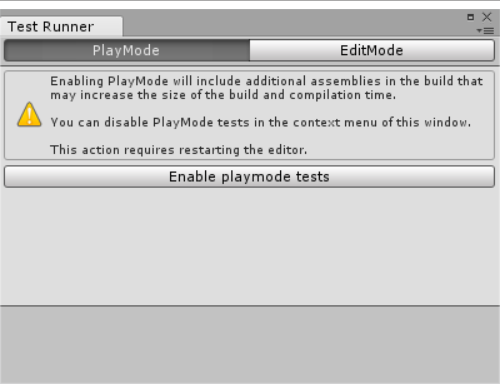
In the resulting dialog box (seen in the screenshot below), click Enable.
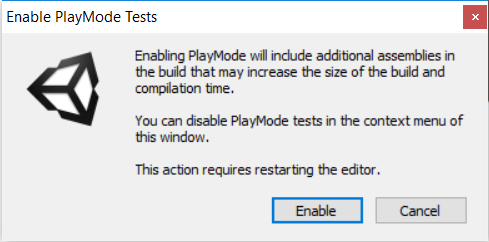
다이얼로그 박스에 에디터를 다시 시작하라고 표시됩니다. Ok 버튼을 클릭하고 직접 에디터를 다시 시작합니다. (다시 시작하기 전에 프로젝트를 저장합니다.)
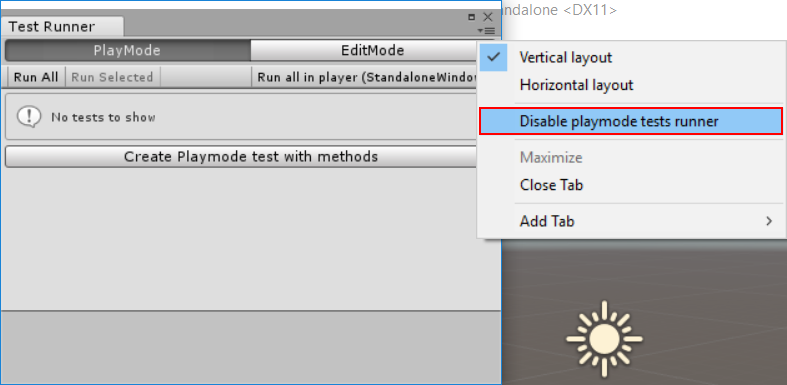
Test Runner 창에서 PlayMode 버튼을 클릭하고 Create Playmode test with methods 버튼을 클릭해서 플레이 모드 테스트 스크립트를 생성합니다. MonoDevelop 또는 필요하다면 선호하는 통합 개발 환경(IDE)에서 열고 편집할 수 있는 베이직 테스트 스크립트가 생성됩니다.
플레이 모드 테스트를 활성화하면 프로젝트 빌드의 추가 어셈블리가 포함되며 프로젝트의 크기와 빌드 시간을 늘릴 수 있습니다.
Test Runner 오른쪽 상단에서 컨텍스트 버튼을 클릭하고 드롭다운 메뉴에서 __Disable playmode tests runner__를 선택해서 플레이 모드에서의 테스트 비활성화해야 합니다.
플레이 모드로 실행 중일 때 UnityTestAttribute를 코루틴으로 실행해야 합니다.
Unity Test Runner에서 테스트 작성과 실행
Unity Test Runner는 편집 모드와 플레이 모드에서 코드를 테스트하며 스탠드얼론, Android, iOS와 같은 타겟 플랫폼에서도 사용 가능합니다.
이 페이지의 문서화는 Unity Test Runner에서의 테스트 작성과 실행에 대해서 논의하며 구독자가 스크립팅과 Unity Test Runner에 대한 기본 지식이 있음을 예상하고 작성됐습니다.
참조: * UnityTestAttribute는 WebGL과 AOT 플랫폼에서 지원되지 않습니다.
UnityTestAttribute
UnityTestAttribute는 플레이 모드에서 IEnumerator를 반환해야 합니다. 플레이 모드에서 테스트를 코루틴으로 실행해야 합니다. 편집 모드에서 테스트가 null을 일드해 현재 프레임을 스킵할 수 있습니다.
Regular NUnit 테스트(Edit 모드와 Play 모드에서 동작)
[Test]
public void GameObject_CreatedWithGiven_WillHaveTheName()
{
    var go = new GameObject("MyGameObject");
    Assert.AreEqual("MyGameObject", go.name);
}
Play 모드 예제
[UnityTest]
public IEnumerator GameObject_WithRigidBody_WillBeAffectedByPhysics()
{
    var go = new GameObject();
    go.AddComponent<Rigidbody>();
    var originalPosition = go.transform.position.y;

    yield return new WaitForFixedUpdate();

    Assert.AreNotEqual(originalPosition, go.transform.position.y);
}
Example in Edit mode
[UnityTest]
public IEnumerator EditorUtility_WhenExecuted_ReturnsSuccess()
{
    var utility = RunEditorUtilityInTheBackgroud();

    while (utility.isRunning)
    {
        yield return null;
    }

    Assert.IsTrue(utility.isSuccess);
}
PrebuildSetupAttribute
테스트를 시작하기 전에 추가 설정이 필요하다면 PrebuildSetupAttribute를 사용해야 합니다. 이를 위해서는 IPebuildSetup 인터페이스를 구현하는 클래스 타입을 지정해야 합니다. 클래스 전체에 설정 코드를 실행해야 한다면(예를 들어 에셋 준비나 특정 테스트에 필요한 설정 등 일부 코드를 테스트 시작 전에 실행하고 싶을 때) IPebuildSetup 인터페이스를 테스트 클래스에 구현해야 합니다.
public class TestsWithPrebuildStep : IPrebuildSetup
{
    public void Setup()
    {
        // Run this code before the tests are executed
    }

    [Test]
    //PrebuildSetupAttribute can be skipped because it's implemented in the same class
    [PrebuildSetup(typeof(TestsWithPrebuildStep))]
    public void Test()
    {
        (...)
    }
}
플레이 모드 진입이나 플레이어 빌드 전 PrebuildSetup 코드를 실행해야 합니다. 설정은 UnityEditor 이름과 함수를 사용할 수 있지만 컴파일 오류를 피하기 위해 “editor” 폴더에 위치시키거나 #if UNITY_EDITOR 지시자로 보호받아야 합니다.
AssertLog
A test fails if a message other than a regular log or warning message is logged. Use the AssertLog class to make a message expected in the log and prevent the test from failing.
예상했던 메시지가 표시되지 않으면 테스트도 실패로 보고됩니다. 테스트는 규칙적인 로그나 경고 메시지가 표시되지 않더라도 실패합니다.
예제
[Test]
public void LogAssertEample()
{
    //Expect a regular log message
    LogAssert.Expect(LogType.Log, "Log message");
    //A log message is expected so without the following line
    //the test would fail
    Debug.Log("Log message");
    //An error log is printed
    Debug.LogError("Error message");
    //Without expecting an error log, the test would fail
    LogAssert.Expect(LogType.Error, "Error message");
}
MonoBehaviourTest
MonoBehaviourTest는 MonoBehaviour 테스트를 작성할 때 래퍼이며 코루틴이기도 합니다. UnityTest에서 MonoBehaviourTest를 일드해 특정 MonoBehaviour를 인스턴스화하고 실행이 끝날 때까지 기다리십시오. 테스트가 얼마나 진행됐는지 확인하려면 I MonoBehaviourTest 인터페이스를 구현해야 합니다.
예제
[UnityTest]
public IEnumerator MonoBehaviourTest_Works()
{
    yield return new MonoBehaviourTest<MyMonoBehaviourTest>();
}

public class MyMonoBehaviourTest : MonoBehaviour, IMonoBehaviourTest
{
    private int frameCount;
    public bool IsTestFinished
    {
        get { return frameCount > 10; }
    }

     void Update()
     {
        frameCount++;
     }
}
플랫폼에서 테스트 실행
플레이 모드에서 특정 플랫폼 관련 테스트를 실행할 수 있습니다.
이를 위해서는 Test Runner 창에서 PlayMode__를 선택하고 Run all in player__ 버튼을 클릭해야 합니다.
현재 플랫폼은 버튼에 괄호로 표시됩니다. 예를 들어 아래 스크린샷에서 버튼은 Run all in player (StandaloneWindows)이며 현재 플랫폼은 Windows입니다.
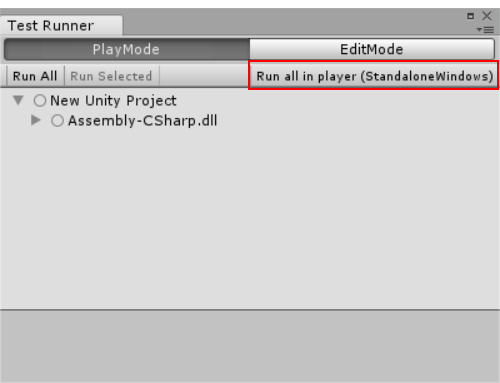
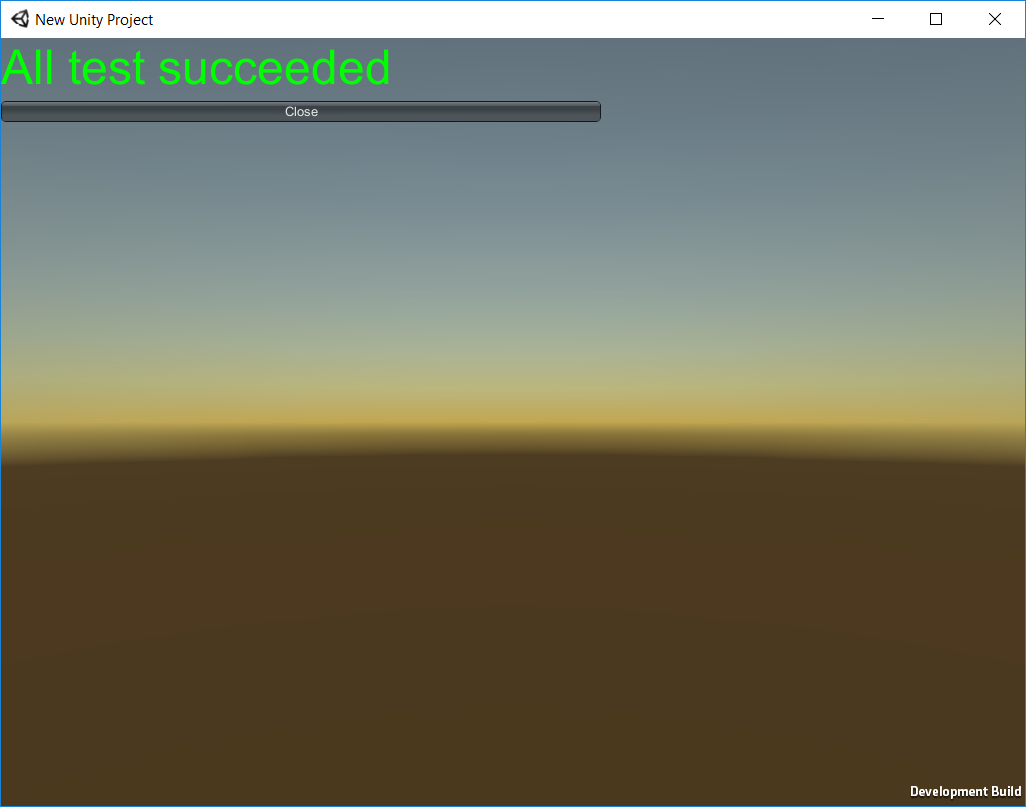
Run all in the player 버튼을 클릭해서 현재 액티브 타겟 플랫폼에서 테스트를 실행해야 합니다. 테스트 결과가 다음 실행을 표시합니다.
커맨드 라인에서 실행
You can also run tests from the command line.
이를 위해서는 다음 인수로 Unity를 실행해야 합니다.
runTest- 프로젝트에서 테스트를 실행합니다.testPlatform- The platform you want to run tests on. Available platforms areplaymodeandeditmode. If unspecified,editmodetests execute by default.testResults- 결과 파일이 저장되는 경로입니다. 결과 파일은 디폴트로 프로젝트의 루트 폴더에 저장됩니다.
예제
>Unity.exe -runTests -projectPath PATH_TO_YOUR_PROJECT -testResults C:\temp\results.xml -testPlatform editmode
Note: This differs depending on your operating system - the above example shows a command line argument on Windows.