- Unity User Manual (5.6)
- Working In Unity
- Editor Features
- Version Control
- Version control integration
Version control integration
Unity поддерживает контроль версий с помощью таких систем как Perforce и Plastic SCM, для более подробной информации пройдите по ссылке выбранной вами системе контроля версий.
Почему я должен использовать систему контроля версий?
Using a version control system makes it easier for a user/multiple users to manage their code. It is a repository of files with monitored access, which in the case of Unity, will be all the files associated with a Unity project. With version control it is possible to follow every change to the source along with information on who made the change, why they made it and what they changed/added. This makes it easy to revert back to an earlier version of the code or to compare differences in versions. It also becomes easier to locate when a bug first occurred along with what code might have caused it.
Настройка контроля версий в Unity
Выполните пошаговую инструкцию по настройке контроля версий в соответствии с вашими требованиями:
Настройте или синхронизируйте рабочую папку на вашем компьютере в зависимости от выбранного клиента (ссылка на Plastic SCM Integration guide или на Perforce Integration guide для помощи в настройке).
Скопируйте существующий проект в рабочую папку или запустите Unity и создайте новый проект в рабочей папке.
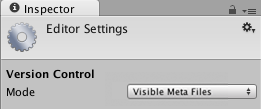
Откройте проект и нажмите в меню сверху Edit->Project Setting->Editor.
Choose your version control Mode according to the version control system that you chose.

Заполните настройки системы контроля версий, такие как логин / пароль/ сервер / рабочая папка.
Проверьте пункт Automatic add он должен быть включен, если вы хотите чтобы ваши добавленные файлы или папка на диске попадали в систему контроля версий автоматически.Иначе вам придется вручную добавлять новые файлы.
Вы можете заниматься разработкой оффлайн. Такой режим разработки рекомендован только продвинутым пользователям, которые знают как правильно интегрировать выбранную систему контроля версий (Разработка оффлайн с Perforce).
The Asset Serialization, Default Behaviour Mode and Sprite Packer options can be edited to suit your team’s preferences and choice of version control.
Нажмите подключится и проверьте статус, в течение короткого времени над кнопкой должно отобразиться “Connected”.
Если вы используете стандартный клиент (т.е p4v) то все файлы в Assets и ProjectSetting папках (включаю файлы с расширением .meta) будут добавлены.
Обратите внимание, что в любой момент вы можете перейти в меню Prefences и выбрать пункт External Tools и настроить Revision Control Diff/Merge Tool.
Использование системы контроля версий
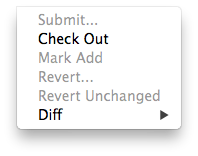
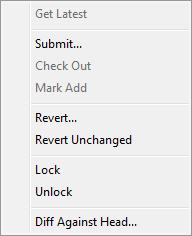
At this point you should be able to do most of the important version control operations directly by right-clicking on the assets in the project view, instead of going through the version control client. The version control operations vary depending on which version control you choose, this table shows what actions are directly available for each version control:
| Процедура проверки версии | Описание | Perforce | Plastic SCM |
| Проверка | Все изменения записываются в файл | Да | Да |
| Diff against head | Compares differences between file locally and in the head | Да | Да |
| Получить последнюю | Pull the latest changes and update file | Да | No* |
| Блокировка | Prevents other users from making changes to file | Да | No** |
| Mark Add | Add locally but not into version control | Да | Да |
| Resolve Conflicts | To resolve conflicts on a file that has been changed by multiple users | Да | No*** |
| Revert | Discards changes made to open changed files | Да | Да |
| Revert Unchanged | Discards changes made to open unchanged files | Да | Да |
| Подтвердить | Submits current state of file to version control | Да | Да |
| Разблокировать | Снимает запрет и позволяет вносить изменения любому желающему | Да | No** |
* To get the latest changes and update the file using Plastic SCM, you need to use the version control window.
** Locking and Unlocking using Plastic SCM require you to edit a specific Plastic SCM lock file externally, see the Plastic SCM Integration page for more information.
*** Conflicts are shown within the version control menu but resolved in the Plastic SCM GUI.


Окно контроля версий
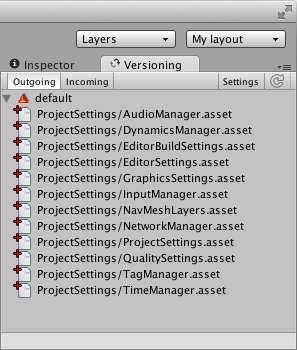
You can overview the files in your changelist from the Version Control Window (Window->Version Control). It is shown here docked next to Inspector in the editor:

The ‘Outgoing’ tab lists all of the local changes that are pending a commit into version control whereas the ‘Incoming’ tab lists all of the changes that need to be pulled from version control.
By right clicking assets or changelists in this window you perform operations on them. To move assets between changelists just drag the assets from one changelist to the header of the target changelist.
Значки
The following icons are displayed in Unity editor to visualize version control status for files/assets:
| Значки | Предположение (Meaning) | Дополнительная информация (Additional information) |
 |
Файл добавлен локально | Pending add into version control |
 |
File added to version control by another user | Pending add into version control |
 |
File is checked out by you | Проверенный локально |
 |
File is checked out by another user | Проверенный удалённо |
 |
There has been a conflict merging this file | Необходимо решить |
 |
Файл был удалён вами | Pending deletion in version control |
 |
File has been deleted by another user | Pending deletion in version control |
 |
Файл ещё не в системе контроля версий | n/a |
 |
Файл заблокирован вами | Не может быть изменено другими пользователями |
 |
Файл заблокирован другим пользователем | Не может быть изменено вами |
 |
Другой пользователь отметился в новой версии данного файла | Чтобы получить последнюю версию, используйте опцию “применять входящие изменения” (“Apply Incoming Changes”) |
Вещи, которые стоит отметить:
- Certain version controls will not allow you to edit assets until they’re marked as Checked out (unless you have Work offline checked).
- При сохранении изменений в .scene файл, это будет автоматически проверено.
- Project Settings inspectors have a checkout button in the bottom right that allow you to checkout settings.
- A yellow warning will often appear to remind you to check out items in order to make changes to them, this mostly applies to Project Settings inspectors.
- In Plastic SCM automatically generated assets such as light maps are automatically added/checked out.
Автоматически возвращать нетронутые файлы при подтверждении
When working with assets, Unity automatically checks out both the asset file as well as the associated .meta file. In most situations however, the .meta file is not modified, which might cause some extra work e.g. when merging branches at a later point.
Оффлайновый режим
Unity поддерживает работу в оффлайне, т.е. чтобы можно было продолжить работу с вашим депозиторием контроля версий без подключения к сети.
- Выберите Work offline в настройках системы контроля версий (Version Control Settings), если вам хочется работать с системой контроля версий без подключения к сети.
Устранение проблем
Если Unity по какой-то причине не может подтвердить сделанные вами изменения в вашем клиенте системы контроля версий, иначе говоря если упал сервер или возникли проблемы с авторизацией, то все ваши изменения сохранятся в отдельном списке.
Работа с сервером ассетов
Для работы с сервером ассетов (встроенная в Unity система контроля версий) обратитесь к документации по ассет серверу.
Работа с другими системами контроля версий
Чтобы работать с системой контроля версий, не поддерживаемой Unity, нужно выбрать MetaData как Mode для контроля версий в настройках редактора. Таким образом с помощью системы контроля версий, вы можете по своему усмотрению управлять исходными ассетами и метаданными для этих ассетов. Для более тесного ознакомления с этой темой, посетите раздел документации, посвящённый внешним системам контроля версий