- Unity User Manual 2023.2
- 资源工作流程
- 资源包
- Removing local asset packages
Removing local asset packages
When you import local asset packages, the Unity Editor places them in the Assets directory in your project.
You can manually remove assets from a project if you know the assets aren’t in use. You might consider this action to unclutter your project directory or to free up space on your local hard drive.
Warning: Make sure your project isn’t using any of the assets you remove. Unlike installed packages, the Package Manager doesn’t track assets that you imported from local asset packages, so it can’t detect when you remove dependent assets.
Before you begin
Make sure you understand these important notes before you begin:
- Use this procedure to remove assets only if you added them to the current project by importing them by following the Importing local asset packages procedure.
- Don’t use this procedure to try to remove packages that you installed from a registry. For information about removing packages that you installed from a registry, refer to Removing an installed package from a project.
- Don’t use this procedure to try to remove Asset Store packages that you downloaded and imported to your project by using the Package Manager window. For information about removing Asset Store packages that you downloaded and imported by using the Package Manager window, refer to Remove imported assets from a project.
- This procedure removes assets from the current project. It doesn’t remove the same assets that might exist in other projects.
Procedure
To remove one or more local asset package items from your project:
Open your project.
Open the Package Manager window and select a context from the navigation panel.
-
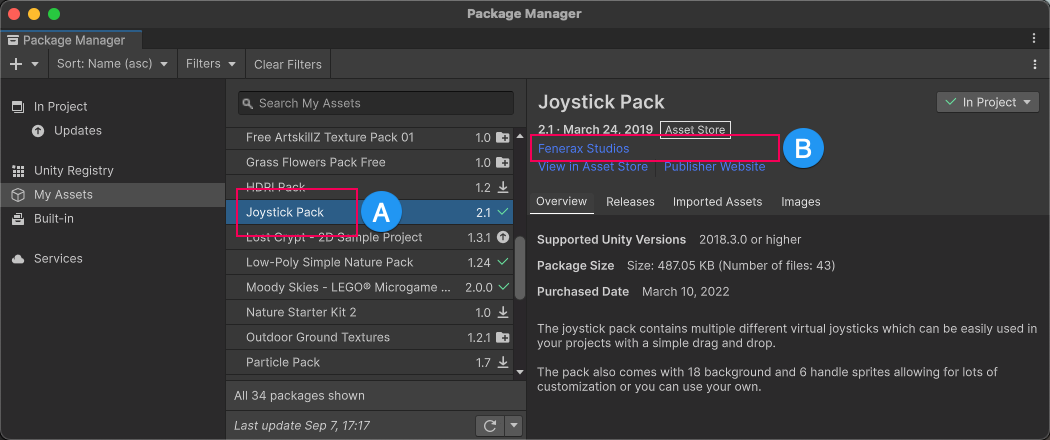
Select the package you want to remove from your project and take note of the package name (A) and the publisher name (B). These names might help you identify the asset directory in a later step.

The My Assets context shows the package name (A) and the publisher name (B) Open the Project window.
Expand the
Assetsdirectory and locate the subdirectory for the package you identified in the Package Manager window in an earlier step.-
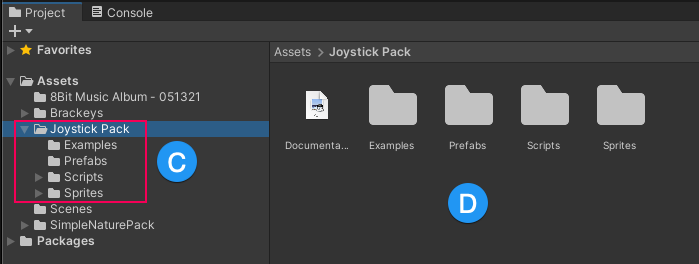
Explore the directory structure that the publisher created (C), confirm it’s the correct package, and identify the assets you want to delete (D). Note: Unity doesn’t impose directory names or structures on publishers, so their assets might not be in an easily identifiable directory. The directory structure might be simple or complex.

The Project window with an assets folder selected (C) and its contents (D) Select the asset or assets you want to delete. Your selection can be a single asset, multiple assets, all assets in a subdirectory, or more.
Right-click the selected items, and select Delete.
Important: Scenes that depend on deleted assets aren’t reported as errors in the Console window. If you suspect the removal caused issues, import the package again. Refer to Importing an Asset Store package.