Asset Store パッケージのインポート
You can import an Asset Store package to your project by using the Package Manager window.
Note: Follow this task to import an Asset Store package that isn’t in your project yet. For information about updating an Asset Store package that’s already in your project, refer to Updating an Asset Store package.
-
Open the Package Manager window and select My Assets from the navigation panel.
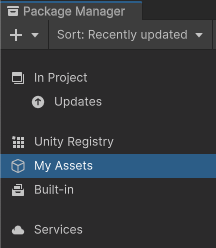
コンテキストを My Assets に切り替えます The list panel displays any packages that you acquired from Asset Store using the Unity ID you’re logged in with.
If many Asset Store packages appear in the My Assets list, you can search for a specific Asset Store package by name.
-
Select the Asset Store package you want to import from the list of packages. The Asset Store package information appears in the details panel.
If you haven’t downloaded the Asset Store package to this computer or device before, the Download button appears. Otherwise, the Import #.# to project button appears instead and you can skip to step 5 to import the Asset Store package right away.
-
Click the Download button to download the Asset Store package if it appears in the details panel.
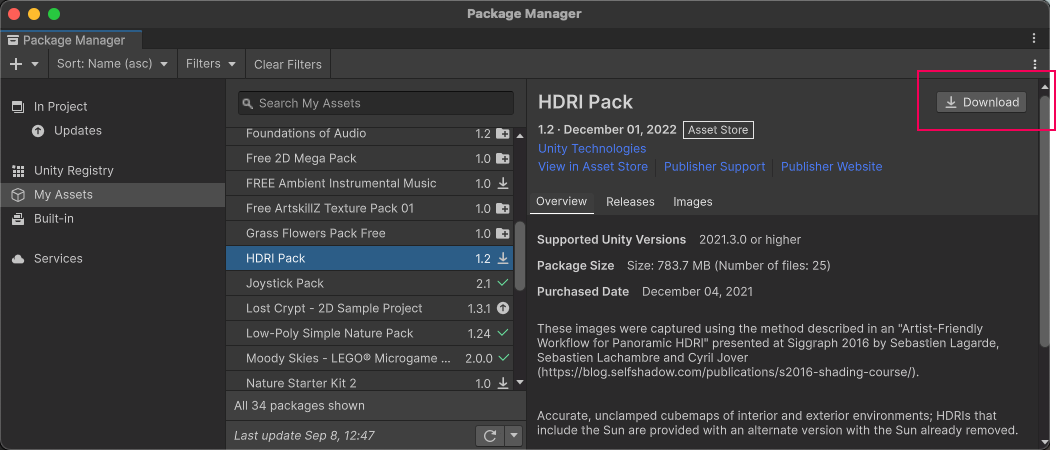
Download button in the corner of the Details panel If the download button appears as Download update #.#*, the asterisk (*) means that you have an older version of that package with the same version number in your package cache. The publisher has subsequently published an updated version of the package without changing its version number. Click that download button to get the latest version of the package.
While the Asset Store package downloads to your computer, a progress bar appears and Pause and Cancel buttons replace the Download button you clicked.
ダウンロードの進行状況と、進行を制御するボタン これらのボタンで、ダウンロードの進行状況を制御することができます。
- 一時停止 ボタンをクリックすると、ダウンロードが一時停止します。続行したい場合は、再生 ボタンをクリックします。
- Cancel ボタンをクリックすると、ダウンロードが完全に停止します。
When the download finishes, the Package Manager replaces Download with a menu containing actions to Import #.# to project and Re-download #.#.
-
Click Import #.# to project to import the selected Asset Store package.
If the Asset Store package is a complete project, a confirmation dialog appears. Refer to Importing a complete project from the Asset Store.
For all other Asset Store packages, the Import Unity Package window displays, with all items selected and ready to import.
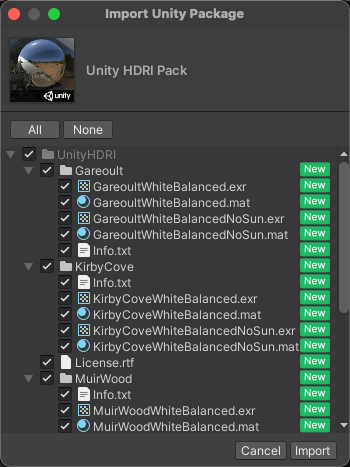
The Import Unity Package window -
インポートしない項目を選択解除し、Import をクリックします。
The Package Manager puts the contents of the imported Asset Store package into the
Assetsfolder, so that you can access them from your Project window.
When the import operation completes, the imported package remains in the My Assets list, but you can also view it in the In Project list. Whenever an update is available for the package, you can view it in the same lists, plus the Updates list, which is nested below In Project.
Tip: You can download multiple packages with one click by using the multiple select feature. For more information, refer to Perform an action on multiple packages.
Viewing imported assets
After you import an Asset Store package, or a subset of assets from an Asset Store package, you can view a list of the imported assets.
To view imported assets:
- Select My Assets in the navigation panel.
- Select the package in the list panel.
- Select the Imported Assets tab in the details panel.
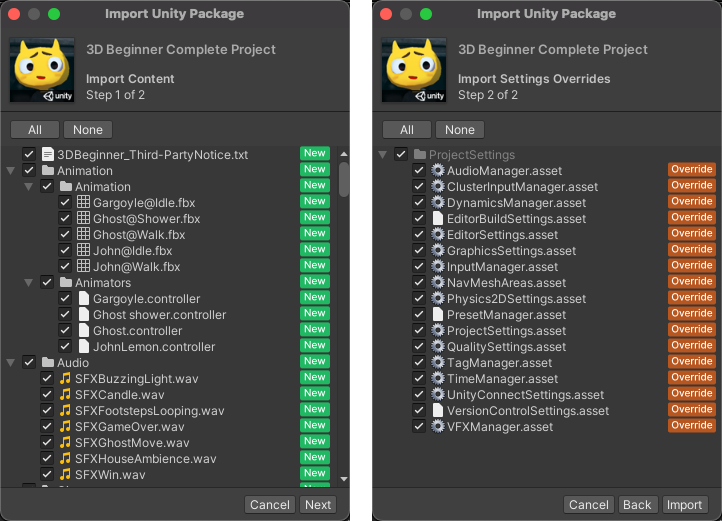
Asset Store から完全なプロジェクトをインポートする
A complete project has assets and project settings. The process for importing a complete project is similar to other Asset Store packages, except there’s an additional step for project settings.
The project settings in the complete project might conflict with settings in your project, so when you import a complete project from the Asset Store, the Package Manager opens a dialog:

Choose Import if you’re sure that you want to add the package’s assets to your project. An Import Unity Package window appears, like the one pictured below. Clear any asset content you don’t want to import and click Next. The second step of the window lists the package’s project settings. If you have any of those project settings in your project, Package Manager identifies them with an Override flag. Those settings will be overwritten with the project settings from the package unless you clear the selection. Clear any project settings you don’t want to import and click Import.
Choose Switch Project if you want to explore the package’s assets and project settings in a safe environment. Choosing Switch Project creates a new, temporary project that has only that package’s assets and project settings. After exploring the temporary project, you can close it without saving. If you want to continue to use that package in your main project, return to your main project and import the package again. Choose Import on the warning dialog that appears.