Unity 멀티플레이어 사용을 시작하려면 Unity 서비스를 사용하도록 프로젝트를 설정해야 합니다. 설정을 완료해야 멀티플레이어 서비스를 활성화할 수 있습니다.
이렇게 하려면 메뉴 바에서 Window > General > Services 를 선택하여 Services 창을 엽니다. Services 창에서 Multiplayer 를 선택합니다.
그러면 Multiplayer 서비스 창이 열립니다.
Go To Dashboard 버튼을 누르면 웹 기반 서비스 대시보드로 이동합니다. 여기서 프로젝트의 멀티플레이어 설정을 수행할 수 있습니다.
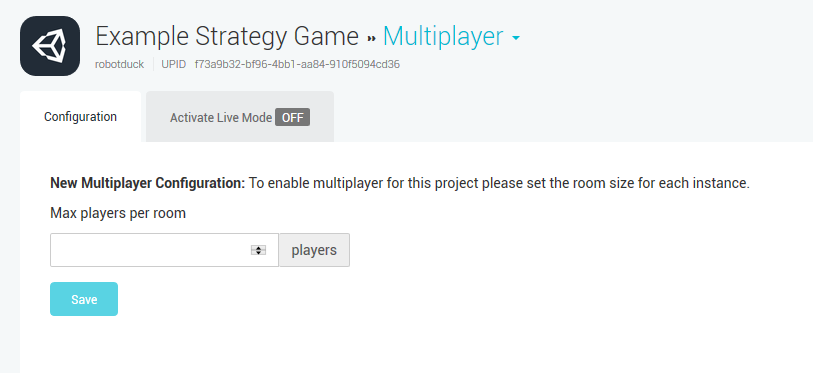
프로젝트에 멀티플레이어 서비스를 아직 설정하지 않은 경우 New Multiplayer Configuration 을 설정하라는 메시지가 표시됩니다. 설정하려면 원하는 룸당 플레이어 수를 입력하고 Save 를 클릭합니다.
Save를 클릭한 후에는 멀티플레이어 서비스 대시보드에 현재 프로젝트가 반영됩니다.
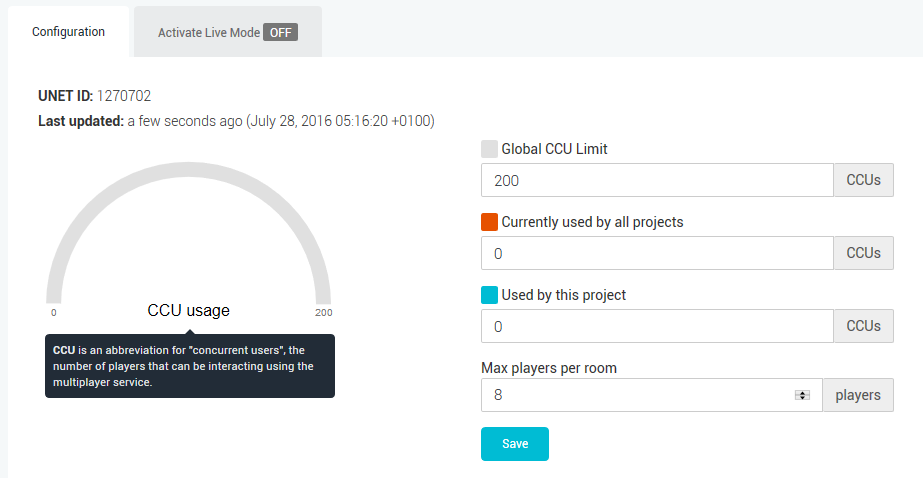
이제 프로젝트를 Unity 멀티플레이어와 통합할 준비가 되었습니다!
Did you find this page useful? Please give it a rating:
Thanks for rating this page!
What kind of problem would you like to report?
Thanks for letting us know! This page has been marked for review based on your feedback.
If you have time, you can provide more information to help us fix the problem faster.
Provide more information
You've told us this page needs code samples. If you'd like to help us further, you could provide a code sample, or tell us about what kind of code sample you'd like to see:
You've told us there are code samples on this page which don't work. If you know how to fix it, or have something better we could use instead, please let us know:
You've told us there is information missing from this page. Please tell us more about what's missing:
You've told us there is incorrect information on this page. If you know what we should change to make it correct, please tell us:
You've told us this page has unclear or confusing information. Please tell us more about what you found unclear or confusing, or let us know how we could make it clearer:
You've told us there is a spelling or grammar error on this page. Please tell us what's wrong:
You've told us this page has a problem. Please tell us more about what's wrong:
Thank you for helping to make the Unity documentation better!
Your feedback has been submitted as a ticket for our documentation team to review.
We are not able to reply to every ticket submitted.