- Unity User Manual (2019.2)
- グラフィックス
- グラフィカルな機能
- シェーダー
- ShaderLab 構文
- ShaderLab: SubShader
- ShaderLab: Pass
- ShaderLab culling and depth testing
ShaderLab culling and depth testing

Culling is an optimization that does not render polygons facing away from the viewer. All polygons have a front and a back side. Culling makes use of the fact that most objects are closed; if you have a cube, you will never see the sides facing away from you (there is always a side facing you in front of it) so Unity doesn’t need to draw the sides facing away. Hence the term: Backface culling.
The other feature that makes rendering looks correct is Depth testing. Depth testing makes sure that only the closest surface objects are drawn in a Scene.
シンタックス
Cull
Cull Back | Front | Off
ポリゴンのどちら側をカリングする(描画しない)か制御。
- Back Don’t render polygons that are facing away from the viewer (default) i.e. back-facing polygons are culled.
- Front Don’t render polygons that are facing towards the viewer. Used for turning objects inside-out.
- Off カリングを無効にして、すべての面を描画します。特殊なエフェクトで使用します。
ZWrite
ZWrite On | Off
Controls whether pixels from this object are written to the depth buffer (default is On). If you’re drawing solid objects, leave this on. If you’re drawing semitransparent effects, switch to ZWrite Off. For more details read below.
ZTest
ZTest Less | Greater | LEqual | GEqual | Equal | NotEqual | Always
デプステストの実行方法。デフォルトは LEqual (すでに描画されているオブジェクトと距離が等しいか、より近い場合に描画します。それより遠い場合はオブジェクトで隠します)
Offset
Offset Factor, Units
Factor と Units、2 つのパラメーターでデプスのオフセットを指定することができます。Factor は、ポリゴンの X または Y に基づいて Z 傾斜の最大値を増減します。Units は、最小の解決できるデプスバッファ値を増減します。これにより、たとえ同じ位置にある場合でも、1 つのポリゴンを他の上 (表面側) に描画することができます。例えば、Offset 0, -1 はポリゴンの傾斜を無視して、ポリゴンをカメラ近くに引き寄せます。一方、Offset -1, -1 は、グレージング角で表示するときに、さらに近くにポリゴンを引き寄せます。
参考例
オブジェクトの反対側の面のみレンダリングします。
Shader "Show Insides" {
    SubShader {
        Pass {
            Material {
                Diffuse (1,1,1,1)
            }
            Lighting On
            Cull Front
        }
    }
}
キューブで適用してみて、周回したときに形状に違和感を感じることに気付いてください。これはキューブの内部しか見ていないためです。
デプス書き込みありの透過シェーダー
通常 透明シェーダーファミリ (部分的に透過なシェーダー)はデプスバッファに書き込みしません。しかしこれにより、特に複雑で Convex (非凸)のメッシュでは、描画順の問題が生まれる可能性があります。もしそのようなメッシュをフェードイン・フェードアウトした場合、透過をレンダリングする前に、デプスバッファを埋めるシェーダーを使用するのが役立ちます。

Shader "Transparent/Diffuse ZWrite" {
Properties {
    _Color ("Main Color", Color) = (1,1,1,1)
    _MainTex ("Base (RGB) Trans (A)", 2D) = "white" {}
}
SubShader {
    Tags {"Queue"="Transparent" "IgnoreProjector"="True" "RenderType"="Transparent"}
    LOD 200

    // デプスバッファのみにレンダリングする追加パス
    Pass {
        ZWrite On
        ColorMask 0
    }

    // Transparent/Diffuse からフォワードレンダリングのパスに貼り付けます
    UsePass "Transparent/Diffuse/FORWARD"
}
Fallback "Transparent/VertexLit"
}
法線のデバッグ
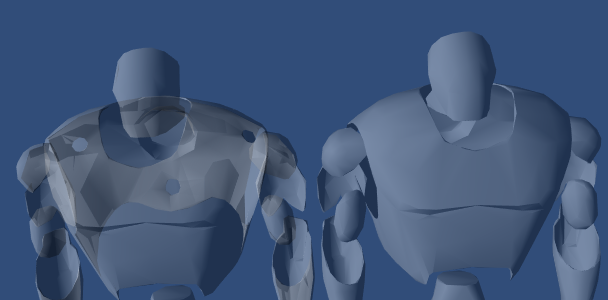
次はより興味深い内容で、最初にオブジェクトを法線マップ頂点ライティングでレンダリングした後、次にバックフェースを明るいピンクでレンダリングします。これにより法線が反転しないといけないところがハイライトされる効果が得られます。物理挙動で制御されたオブジェクトがどれかのメッシュにより’吸い込まれる’ 現象がある場合、このシェーダーを割り当ててください。もしピンクの部分が見える場合、メッシュは引きこまれてしまいます。
実際にやってみます。
Shader "Reveal Backfaces" {
    Properties {
        _MainTex ("Base (RGB)", 2D) = "white" { }
    }
    SubShader {
        // オブジェクトの前向き部分をレンダリングします
        // シンプルな白いマテリアルを使用し、メインテクスチャを適用します
        Pass {
            Material {
                Diffuse (1,1,1,1)
            }
            Lighting On
            SetTexture [_MainTex] {
                Combine Primary * Texture
            }
        }

        // 大部分の後ろ向きの三角をレンダリングします
        // 空間で目立つ色: 明るいピンク!
        Pass {
            Color (1,0,1,1)
            Cull Front
        }
    }
}
グラスカリング
カリングの制御はバックフェース以外でも便利です。透過オブジェクトで、オブジェクトのバックフェースを表示したい場合があります。もしカリング一切なしでレンダリングした場合( Cull Off )、いくつかの裏面が表面と重なってしまうことがよくあります。
次の例は、凸なオブジェクト(球、キューブ、車のフロントガラス)で使用できる、シンプルなシェーダーです。
Shader "Simple Glass" {
    Properties {
        _Color ("Main Color", Color) = (1,1,1,0)
        _SpecColor ("Spec Color", Color) = (1,1,1,1)
        _Emission ("Emmisive Color", Color) = (0,0,0,0)
        _Shininess ("Shininess", Range (0.01, 1)) = 0.7
        _MainTex ("Base (RGB)", 2D) = "white" { }
    }

    SubShader {
        // マテリアルをサブシェーダーで定義することによって、多くのパスで使用します。
        // ここで定義したものは、含まれるパスのデフォルト値になります。
        Material {
            Diffuse [_Color]
            Ambient [_Color]
            Shininess [_Shininess]
            Specular [_SpecColor]
            Emission [_Emission]
        }
        Lighting On
        SeparateSpecular On

        // アルファブレンディングを設定
        Blend SrcAlpha OneMinusSrcAlpha

        // オブジェクトの後ろ向き部分をレンダリング
        // オブジェクトが凸状ならば、これらは常に前向き部分より
        // 遠くになります
        Pass {
            Cull Front
            SetTexture [_MainTex] {
                Combine Primary * Texture
            }
        }
        // こちらを向いているオブジェクトをレンダリングします
        // オブジェクトが凸状ならば、これらは常に後ろ向き部分より
        // 近くになります
        Pass {
            Cull Back
            SetTexture [_MainTex] {
                Combine Primary * Texture
            }
        }
    }
}