- Unity User Manual 2022.1
- Create user interfaces (UI)
- UI Toolkit
- UI の構築
- UI 構築の例
- リストビューのランタイム UI の作成
リストビューのランタイム UI の作成
Version: 2021.3+
This example demonstrates how to create a list view runtime UI.
例の概要
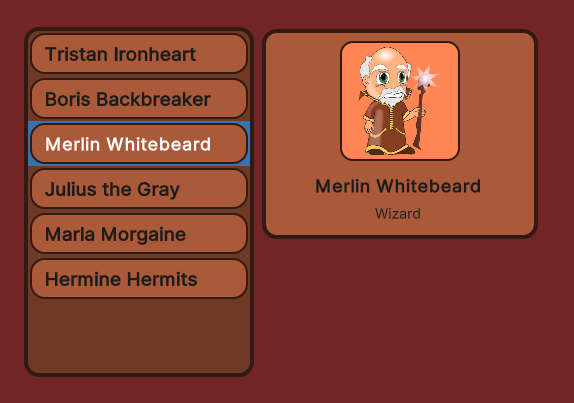
この例は、簡単なキャラクター選択画面を作成します。左側のリストからキャラクター名をクリックすると、右側にキャラクターの詳細が表示されます。

この例で作成される完成されたファイルは、こちらの GitHub リポジトリ にあります。
要件
このガイドは、Unity エディター、UI Toolkit、および C# スクリプトに精通している開発者を対象としています。始める前に、以下をよく理解してください。
* UXML
* ListView
* Label
* PanelSettings
* UIDocument
メイン UI ドキュメントの作成
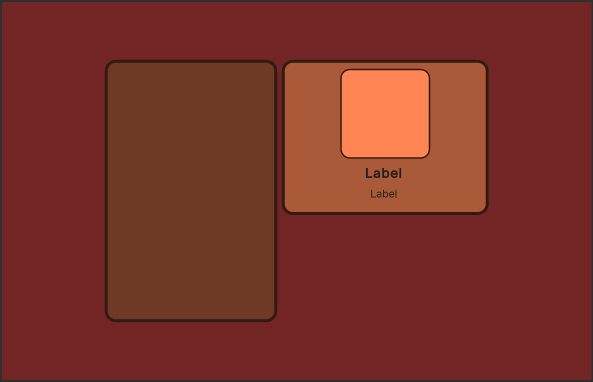
メインビューの UI ドキュメントと、ビジュアル要素のスタイルを設定するための USS ファイルを作成します。UI ドキュメントにコンテナとして 2 つのビジュアル要素を追加します。1 つはキャラクター名のリスト、もう 1 つは選択されたキャラクターの詳細を含みます。

Unity で任意のテンプレートでプロジェクトを作成します。
Project ウィンドウで、全ての UI ドキュメントとスタイルシートファイルを格納するための
UIという名前のフォルダーを作成します。-
UIフォルダー内に、以下の内容を含むMainView.uxmlという UI ドキュメントを作成します。<ui:UXML xmlns:ui="UnityEngine.UIElements" xmlns:uie="UnityEditor.UIElements" editor-extension-mode="False"> <Style src="MainView.uss" /> <ui:VisualElement name="background"> <ui:VisualElement name="main-container"> <ui:ListView focusable="true" name="character-list" /> <ui:VisualElement name="right-container"> <ui:VisualElement name="details-container"> <ui:VisualElement name="details"> <ui:VisualElement name="character-portrait" /> </ui:VisualElement> <ui:Label text="Label" name="character-name" /> <ui:Label text="Label" display-tooltip-when-elided="true" name="character-class" /> </ui:VisualElement> <ui:Button text="Select Character" display-tooltip-when-elided="true" name="select-char-button" /> </ui:VisualElement> </ui:VisualElement> </ui:VisualElement> </ui:UXML> -
UIフォルダー内に、以下の内容を含むMainView.ussという USS スタイルシートを作成します。#background { flex-grow: 1; align-items: center; justify-content: center; background-color: rgb(115, 37, 38); } #main-container { flex-direction: row; height: 350px; } #character-list { width: 230px; border-color: rgb(49, 26, 17); border-width: 4px; background-color: rgb(110, 57, 37); border-radius: 15px; margin-right: 6px; } #character-name { -unity-font-style: bold; font-size: 18px; } #CharacterClass { margin-top: 2px; margin-bottom: 8px; padding-top: 0; padding-bottom: 0; } #select-char-button { width: 150px; border-color: rgb(49, 26, 17); background-color: rgb(255, 133, 84); border-width: 2px; } #right-container{ justify-content: space-between; align-items: flex-end; } #details-container{ align-items: center; background-color: rgb(170, 89, 57); border-width: 4px; border-color: rgb(49, 26, 17); border-radius: 15px; width: 252px; justify-content: center; padding: 8px; height: 163px; } #details{ border-color: rgb(49, 26, 17); border-width: 2px; height: 120px; width: 120px; border-radius: 13px; padding: 4px; background-color: rgb(255, 133, 84); } #character-portrait{ flex-grow: 1; -unity-background-scale-mode: scale-to-fit; }
リストエントリー UI ドキュメントの作成
リスト内の個々のエントリーの UI ドキュメントとスタイルシートを作成します。キャラクターリストのエントリーは、色付きの背景フレームとキャラクターの名前から構成されます。

-
UIフォルダー内に、以下の内容を含むListEntry.uxmlという UI ドキュメントを作成します。<ui:UXML xmlns:ui="UnityEngine.UIElements" xmlns:uie="UnityEditor.UIElements" editor-extension-mode="False"> <Style src="ListEntry.uss" /> <ui:VisualElement name="list-entry"> <ui:Label text="Label" display-tooltip-when-elided="true" name="character-name" /> </ui:VisualElement> </ui:UXML> -
UIフォルダー内に、以下の内容を含むListEntry.ussという名前のスタイルシートファイルを作成します。#list-entry { height: 41px; align-items: flex-start; justify-content: center; padding-left: 10px; background-color: rgb(170, 89, 57); border-color: rgb(49, 26, 17); border-width: 2px; border-radius: 15px; } #character-name { -unity-font-style: bold; font-size: 18px; color: rgb(49, 26, 17); }
表示するサンプルデータの作成
UI 内のキャラクターリストを埋めるサンプルデータを作成します。キャラクターリスト用に、キャラクター名、クラス、ポートレート画像を持つクラスを作成します。
Asset フォルダー内に、C# スクリプトを格納するための
Scriptsというフォルダーを作成します。-
Scriptsフォルダー内に、以下の内容を持つCharacterData.csという名前の C# スクリプトを作成します。using UnityEngine; public enum ECharacterClass { Knight, Ranger, Wizard } [CreateAssetMenu] //This adds an entry to the **Create** menu public class CharacterData : ScriptableObject { public string m_CharacterName; public ECharacterClass m_Class; public Sprite m_PortraitImage; }これにより、Assets > Create メニューに Character Data アイテムが作成されます。
Assets フォルダー内に、
Resourcesというフォルダーを作成します。Resourcesフォルダー内に、全てのサンプルキャラクターデータを格納するためのCharactersというフォルダーを作成します。Charactersフォルダー内で右クリックし、Create > Character Data を選択してScriptableObjectのインスタンスを作成します。CharacterDataインスタンスをさらに作成し、それらをプレースホルダーデータで埋めます。
シーンの設定
サンプルシーン内に UIDocument ゲームオブジェクトを作成し、UI Document をソースアセットとして加えます。
- サンプルシーンで GameObject > UI Toolkit > UI Document の順にクリックします。
- Hierarchy ウィンドウで UIDocument ゲームオブジェクトを選択します。
- Project ウィンドウから、MainView.uxml を、Inspector ウィンドウの UI Document コンポーネントの Source Asset フィールドにドラッグします。これにより、この UXML ファイルのソースアセットが参照されます。
リストエントリーおよびメインビュー用のコントローラーの作成
以下のクラスを使用して 2 つの C# スクリプトを作成します。
- キャラクターインスタンスのデータをリストエントリーの UI に表示するための
CharacterListEntryControllerクラス。これは、キャラクター名のラベルにアクセスし、指定のキャラクターインスタンスの名前を表示するためにそれを設定する必要があります。 - メインビューのキャラクターリスト用の
CharacterListControllerクラスと、それをインスタンス化してビジュアルツリーに割り当てるMonoBehaviourスクリプト。
ノート: CharacterListEntry クラスは MonoBehaviour ではありません。UI Toolkit のビジュアル要素はゲームオブジェクトではないので、これにコンポーネントをアタッチすることはできません。代わりに、CharacterListController クラス内の userData プロパティにこのクラスをアタッチします。
-
Scriptsフォルダー内に、以下の内容を含むCharacterListEntryController.csという名前の C# スクリプトを作成します。using UnityEngine.UIElements; public class CharacterListEntryController { Label m_NameLabel; //This function retrieves a reference to the //character name label inside the UI element. public void SetVisualElement(VisualElement visualElement) { m_NameLabel = visualElement.Q<Label>("character-name"); } //This function receives the character whose name this list //element displays. Since the elements listed //in a `ListView` are pooled and reused, it's necessary to //have a `Set` function to change which character's data to display. public void SetCharacterData(CharacterData characterData) { m_NameLabel.text = characterData.m_CharacterName; } } -
Scriptsフォルダー内に、以下の内容を含むCharacterListController.csという名前の C# スクリプトを作成します。using System.Collections.Generic; using UnityEngine; using UnityEngine.UIElements; public class CharacterListController { // UXML template for list entries VisualTreeAsset m_ListEntryTemplate; // UI element references ListView m_CharacterList; Label m_CharClassLabel; Label m_CharNameLabel; VisualElement m_CharPortrait; public void InitializeCharacterList(VisualElement root, VisualTreeAsset listElementTemplate) { EnumerateAllCharacters(); // Store a reference to the template for the list entries m_ListEntryTemplate = listElementTemplate; // Store a reference to the character list element m_CharacterList = root.Q<ListView>("character-list"); // Store references to the selected character info elements m_CharClassLabel = root.Q<Label>("character-class"); m_CharNameLabel = root.Q<Label>("character-name"); m_CharPortrait = root.Q<VisualElement>("character-portrait"); FillCharacterList(); // Register to get a callback when an item is selected m_CharacterList.onSelectionChange += OnCharacterSelected; } List<CharacterData> m_AllCharacters; void EnumerateAllCharacters() { m_AllCharacters = new List<CharacterData>(); m_AllCharacters.AddRange(Resources.LoadAll<CharacterData>("Characters")); } void FillCharacterList() { // Set up a make item function for a list entry m_CharacterList.makeItem = () => { // Instantiate the UXML template for the entry var newListEntry = m_ListEntryTemplate.Instantiate(); // Instantiate a controller for the data var newListEntryLogic = new CharacterListEntryController(); // Assign the controller script to the visual element newListEntry.userData = newListEntryLogic; // Initialize the controller script newListEntryLogic.SetVisualElement(newListEntry); // Return the root of the instantiated visual tree return newListEntry; }; // Set up bind function for a specific list entry m_CharacterList.bindItem = (item, index) => { (item.userData as CharacterListEntryController).SetCharacterData(m_AllCharacters[index]); }; // Set a fixed item height m_CharacterList.fixedItemHeight = 45; // Set the actual item's source list/array m_CharacterList.itemsSource = m_AllCharacters; } void OnCharacterSelected(IEnumerable<object> selectedItems) { // Get the currently selected item directly from the ListView var selectedCharacter = m_CharacterList.selectedItem as CharacterData; // Handle none-selection (Escape to deselect everything) if (selectedCharacter == null) { // Clear m_CharClassLabel.text = ""; m_CharNameLabel.text = ""; m_CharPortrait.style.backgroundImage = null; return; } // Fill in character details m_CharClassLabel.text = selectedCharacter.m_Class.ToString(); m_CharNameLabel.text = selectedCharacter.m_CharacterName; m_CharPortrait.style.backgroundImage = new StyleBackground(selectedCharacter.m_PortraitImage); } }
コントローラースクリプトをメインビューにアタッチする
CharacterListController は MonoBehaviour ではないので、ビジュアルツリーにアタッチされる必要があります。同じゲームオブジェクトに UI ドキュメントとしてアタッチできる MonoBehaviour スクリプトを作成してください。これが CharacterListController をインスタンス化してビジュアルツリーにアタッチします。
-
Scriptsフォルダー内に、以下の内容を含むMainView.csという C# スクリプトを作成します。using UnityEngine; using UnityEngine.UIElements; public class MainView : MonoBehaviour { [SerializeField] VisualTreeAsset m_ListEntryTemplate; void OnEnable() { // UXML は、すでに UIDocument component コンポーネントによってインスタンス化済み var uiDocument = GetComponent<UIDocument>(); // キャラクターリストコントローラーを初期化 var characterListController = new CharacterListController(); characterListController.InitializeCharacterList(uiDocument.rootVisualElement, m_ListEntryTemplate); } } サンプルシーン内で UIDocument を選択します。
MainView.csを Inspector ウィンドウの Add Component にドラッグします。ListEntry.uxml を ListEntry Template フィールドにドラッグします。
再生モードを開始すると、ゲームビューに UI が表示されます。