- Unity User Manual 2023.2
- ユーザーインターフェース (UI)
- UI Toolkit
- UI Renderer
- Mesh API を使って放射状の進捗インジケーターを作成する
Mesh API を使って放射状の進捗インジケーターを作成する
Version: 2023.2+
この例では、Mesh API を使用してビジュアル要素にビジュアルコンテンツを描画する方法を示します。
ノート: Mesh API は上級者向けのツールです。バージョン 2022.1 以降では、単純なジオメトリのみを生成したい場合は、代わりに Vector API を使用してください。詳細については、Vector API を使って放射状の進捗インジケーターを作成する を参照してください。
例の概要
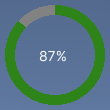
この例では、ローディングバーの代わりに進行状況を表示するカスタムコントロールを作成します。進捗インジケーターは、パーセンテージを表示するラベルの周囲に、部分的に塗りつぶされた輪で進捗値を表示します。0 から 100 までの値で表示され、それにより輪がどの程度塗りつぶされるかが決定されます。

You can find the completed files that this example creates in this GitHub repository.
要件
このガイドは、Unity エディター、UI Toolkit、および C# スクリプトに精通している開発者を対象としています。始める前に、以下をよく理解してください。
放射状の進捗インジケーターとそのカスタムメッシュを作成する
Create a C# script to define the RadialProgress class, and expose the control to UXML and UI Builder.
- 任意のテンプレートで Unity プロジェクトを作成します。
-
radial-progressというフォルダーを作成し、ファイルを保存します。 -
radial-progressフォルダーに、以下のコンテンツを含むRadialProgress.csという C# スクリプトを作成します。
Create the custom mesh
Create a C# script named EllipseMesh.cs with the following content:
Style the custom control
Create a USS file named RadialProgress.uss with the following content:
UI Document でカスタムコントロールを使用しテストする
Use UI Builder to add the control and apply the USS stylesheet. Test the control with different Progress values.
-
RadialProgressExample.uxmlという名前の UI Document を作成します。 -
RadialProgressExample.uxmlをダブルクリックして UI Builder で開きます。 - Library ウィンドウで、Project > Custom Controls > MyUILibrary を選択します。
- RadialProgress を Hierarchy ウィンドウにドラッグします。
- In the StyleSheets section of the UI Builder, add
RadialProgress.ussas the existing USS. - Hierarchy ウィンドウで、RadialProgress を選択します。
- Inspector ウィンドウの Name フィールドに
radial-progressと入力します。 - In the Inspector window, enter different values in the Progress box. The percentage in the Viewport changes, and the green progress ring resizes.
Create logic to update the progress with dynamic values
Create a C# MonoBehaviour script to update the Progress property of the control with dynamic values for demo purposes. In the radial-progress folder, create a C# MonoBehaviour named RadialProgressComponent.cs with the following content:
Test the progress indicator in runtime
- Unity で、GameObject > UI Toolkit > UI Document を選択します。
- Hierarchy ウィンドウで UIDocument を選択します。
- UIDocument ゲームオブジェクトのコンポーネントとして RadialProgressComponent.cs を加えます。
- 再生モードに入ります。シーンに進捗インジケーターが表示され、進捗リングと値が動的に変化します。