- Unity User Manual 2021.1 (beta)
- Working in Unity
- Создание геймплея.
- Публикация сборок
Публикация сборок
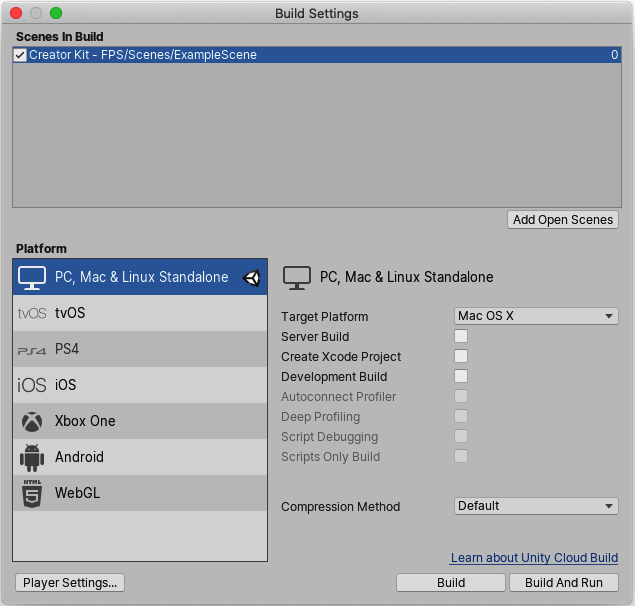
The Build Settings window contains all the settings and options you need to publish your build to a variety of platforms. From this window you can create a Development Build to test your application, as well as publishing a final build. To adjust the publishing settings for your application’s build go to File > Build Settings.

Use the Scenes in Build panel to manage which Scenes Unity includes in the build. You can use the Platform section of the window to select which platform you want to build to, and adjust specific settings such as the Compression Method. These options vary depending on the Platform you select. For more information, see the documentation on Build Settings
Select the Build or Build And Run button to begin the build process.
You can choose a name and save location for your application through the Save dialog that appears. Note: depending on the platform you build to, Unity might only prompt you to choose a folder.
When you select the Save button, Unity builds your application. If you are unsure where to save your build, consider making a subfolder inside your root folder to hold your builds. You cannot save the build into the Assets folder.
Further information on building games with Unity
To learn more about constructing Scenes, see documentation on Creating Scenes.
To learn more about scripting, see documentation on Scripting.
To learn more about creating art and importing assets, see documentation on Assets Workflow.
To interact with Unity users and developers, see the Unity Forums.