Unity Manual
- Unity User Manual (2018.3)
- Working in Unity
- Getting Started
- Unity Hub
- Installing Unity using the Hub
- Adding components to the Unity Editor
- Installing Unity without the hub
- Installing Unity offline without the Hub
- Unity Hub advanced deployment considerations
- 2D or 3D projects
- Project Templates
- Starting Unity for the first time
- Opening existing Projects
- Learning the interface
- Asset Workflow
- The Main Windows
- Creating Gameplay
- Editor Features
- Advanced Development
- Advanced Editor Topics
- Licenses and Activation
- Upgrade Guides
- Using the Automatic API Updater
- Upgrading to Unity 2018.3
- Upgrading to Unity 2018.2
- Upgrading to Unity 2018.1
- Upgrading to Unity 2017.3
- Upgrading to Unity 2017.2
- Upgrading to Unity 2017.1
- Upgrading to Unity 5.6
- Upgrading to Unity 5.5
- Upgrading to Unity 5.4
- Upgrading to Unity 5.3
- Upgrading to Unity 5.2
- Upgrading to Unity 5.0
- Upgrading to Unity 4.0
- Upgrading to Unity 3.5
- Getting Started
- Importing
- 2D
- Gameplay in 2D
- 2D Sorting
- Sprites
- Tilemap
- Physics Reference 2D
- Graphics
- Graphics Overview
- Lighting
- Lighting overview
- Lighting Window
- Light Explorer
- Light sources
- Shadows
- Global Illumination
- Lightmapping
- Lightmap Parameters
- Baked ambient occlusion
- LOD for baked lightmaps
- Light Probes
- Reflection probes
- Lighting Modes
- GI visualizations in the Scene view
- Lighting Data Asset
- Lightmap Directional Modes
- Lightmaps: Technical information
- Material properties and the GI system
- Global Illumination UVs
- GI cache
- Light troubleshooting and performance
- Related topics
- Cameras
- Materials, Shaders & Textures
- Textures
- Creating and Using Materials
- Standard Shader
- Standard Particle Shaders
- Physically Based Rendering Material Validator
- Accessing and Modifying Material parameters via script
- Writing Shaders
- Legacy Shaders
- Video overview
- Terrain Engine
- Tree Editor
- Particle Systems
- Post-processing overview
- Advanced Rendering Features
- Procedural Mesh Geometry
- Optimizing graphics performance
- Layers
- Lighting
- Graphics Reference
- Cameras Reference
- Shader Reference
- Writing Surface Shaders
- Writing vertex and fragment shaders
- Vertex and fragment shader examples
- Shader semantics
- Accessing shader properties in Cg/HLSL
- Providing vertex data to vertex programs
- Built-in shader include files
- Predefined Shader preprocessor macros
- Built-in shader helper functions
- Built-in shader variables
- Making multiple shader program variants
- GLSL Shader programs
- Shading Language used in Unity
- Shader Compilation Target Levels
- Shader data types and precision
- Using sampler states
- ShaderLab Syntax
- Shader assets
- Advanced ShaderLab topics
- Unity's Rendering Pipeline
- Performance tips when writing shaders
- Rendering with Replaced Shaders
- Custom Shader GUI
- Using Depth Textures
- Camera's Depth Texture
- Platform-specific rendering differences
- Shader Level of Detail
- Texture arrays
- Debugging DirectX 11/12 shaders with Visual Studio
- Debugging DirectX 12 shaders with PIX
- Implementing Fixed Function TexGen in Shaders
- Particle Systems reference
- Particle System
- Particle System modules
- Particle System Main module
- Emission module
- Shape Module
- Velocity over Lifetime module
- Noise module
- Limit Velocity Over Lifetime module
- Inherit Velocity module
- Force Over Lifetime module
- Color Over Lifetime module
- Color By Speed module
- Size over Lifetime module
- Size by Speed module
- Rotation Over Lifetime module
- Rotation By Speed module
- External Forces module
- Collision module
- Triggers module
- Sub Emitters module
- Texture Sheet Animation module
- Lights module
- Trails module
- Custom Data module
- Renderer module
- Particle System Force Field
- Particle Systems (Legacy, prior to release 3.5)
- Visual Effects Reference
- Mesh Components
- Texture Components
- Rendering Components
- Rendering Pipeline Details
- Graphics HOWTOs
- How do I Import Alpha Textures?
- How do I Make a Skybox?
- How do I make a Mesh Particle Emitter? (Legacy Particle System)
- How do I make a Spot Light Cookie?
- How do I fix the rotation of an imported model?
- Water in Unity
- Art Asset best practice guide
- Importing models from 3D modeling software
- How to do Stereoscopic Rendering
- Graphics Tutorials
- Scriptable Render Pipeline
- Graphics Overview
- Physics
- Scripting
- Scripting Overview
- Creating and Using Scripts
- Variables and the Inspector
- Controlling GameObjects using components
- Event Functions
- Time and Framerate Management
- Creating and Destroying GameObjects
- Coroutines
- Namespaces
- Attributes
- Order of Execution for Event Functions
- Understanding Automatic Memory Management
- Platform dependent compilation
- Special folders and script compilation order
- Script compilation and assembly definition files
- Managed code stripping
- .NET profile support
- Referencing additional class library assemblies
- Stable scripting runtime: known limitations
- Generic Functions
- Scripting restrictions
- Script Serialization
- UnityEvents
- What is a Null Reference Exception?
- Important Classes
- Vector Cookbook
- Scripting Tools
- Event System
- C# Job System
- Scripting Overview
- Multiplayer and Networking
- Multiplayer Overview
- Setting up a multiplayer project
- Using the Network Manager
- Using the Network Manager HUD
- The Network Manager HUD in LAN mode
- The Network Manager HUD in Matchmaker mode
- Converting a single-player game to Unity Multiplayer
- Debugging Information
- The Multiplayer High Level API
- Multiplayer Component Reference
- Multiplayer Classes Reference
- UnityWebRequest
- Audio
- Audio Overview
- Audio files
- Tracker Modules
- Audio Mixer
- Native Audio Plugin SDK
- Audio Profiler
- Ambisonic Audio
- Audio Reference
- Audio Clip
- Audio Listener
- Audio Source
- Audio Mixer
- Audio Filters
- Audio Effects
- Audio Low Pass Effect
- Audio High Pass Effect
- Audio Echo Effect
- Audio Flange Effect
- Audio Distortion Effect
- Audio Normalize Effect
- Audio Parametric Equalizer Effect
- Audio Pitch Shifter Effect
- Audio Chorus Effect
- Audio Compressor Effect
- Audio SFX Reverb Effect
- Audio Low Pass Simple Effect
- Audio High Pass Simple Effect
- Reverb Zones
- Microphone
- Audio Settings
- Animation
- Animation System Overview
- Animation Clips
- Animator Controllers
- Retargeting of Humanoid animations
- Performance and optimization
- Animation Reference
- Animation FAQ
- Playables API
- A Glossary of animation terms
- Timeline
- UI
- Navigation and Pathfinding
- Navigation Overview
- Navigation System in Unity
- Inner Workings of the Navigation System
- Building a NavMesh
- NavMesh building components
- Advanced NavMesh Bake Settings
- Creating a NavMesh Agent
- Creating a NavMesh Obstacle
- Creating an Off-mesh Link
- Building Off-Mesh Links Automatically
- Building Height Mesh for Accurate Character Placement
- Navigation Areas and Costs
- Loading Multiple NavMeshes using Additive Loading
- Using NavMesh Agent with Other Components
- Navigation Reference
- Navigation How-Tos
- Navigation Overview
- Unity Services
- Setting up your project for Unity Services
- Unity Organizations
- Unity Ads
- Unity Analytics
- Unity Analytics Overview
- Setting Up Analytics
- Analytics Dashboard
- Analytics events
- Funnels
- Remote Settings
- Unity Analytics A/B Testing
- Monetization
- User Attributes
- Unity Analytics Raw Data Export
- Data reset
- Upgrading Unity Analytics
- COPPA Compliance
- Unity Analytics and the EU General Data Protection Regulation (GDPR)
- Analytics Metrics, Segments, and Terminology
- Unity Cloud Build
- Automated Build Generation
- Supported platforms
- Supported versions of Unity
- Version control systems
- Using the Unity Developer Dashboard to configure Unity Cloud Build for Git
- Using the Unity Editor to configure Unity Cloud Build for Git
- Using the Unity Developer Dashboard to configure Unity Cloud Build for Mercurial
- Using the Unity Editor to configure Unity Cloud Build for Mercurial
- Using Apache Subversion (SVN) with Unity Cloud Build
- Using the Unity Developer Dashboard to configure Unity Cloud Build for Perforce
- Using the Unity Editor to configure Unity Cloud Build for Perforce
- Building for iOS
- Advanced options
- Build manifest
- Cloud Build REST API
- Unity IAP
- Setting up Unity IAP
- Cross Platform Guide
- Codeless IAP
- Defining products
- Subscription Product support
- Initialization
- Browsing Product Metadata
- Initiating Purchases
- Processing Purchases
- Handling purchase failures
- Restoring Transactions
- Purchase Receipts
- Receipt validation
- Store Extensions
- Cross-store installation issues with Android in-app purchase stores
- Store Guides
- Implementing a Store
- IAP Promo
- Unity Collaborate
- Setting up Unity Collaborate
- Adding team members to your Unity Project
- Viewing history
- Enabling Cloud Build with Collaborate
- Managing Unity Editor versions
- Reverting files
- Resolving file conflicts
- Excluding Assets from publishing to Collaborate
- Publishing individual files to Collaborate
- Restoring previous versions of a project
- In-Progress edit notifications
- Managing cloud storage
- Moving your Project to another version control system
- Collaborate troubleshooting tips
- Unity Cloud Diagnostics
- Unity Integrations
- Multiplayer Services
- XR
- XR SDKs
- Google VR
- Vuforia
- Windows Mixed Reality
- Unity XR input
- XR API reference
- Mixed Reality Devices
- VR overview
- VR devices
- Single Pass Stereo rendering (Double-Wide rendering)
- VR Audio Spatializers
- VR frame timing
- XR SDKs
- Open-source repositories
- Asset Store Publishing
- Platform-specific
- Standalone
- macOS
- Apple TV
- WebGL
- Player settings for the WebGL platform
- Getting started with WebGL development
- WebGL Browser Compatibility
- Building and running a WebGL project
- WebGL: Deploying compressed builds
- Debugging and troubleshooting WebGL builds
- WebGL Graphics
- WebGL Networking
- Using Audio In WebGL
- WebGL performance considerations
- Memory in WebGL
- WebGL: Interacting with browser scripting
- Using WebGL Templates
- Cursor locking and full-screen mode in WebGL
- Input in WebGL
- iOS
- Getting started with iOS development
- Player settings for the iOS platform
- iOS 2D Texture Overrides
- Upgrading to 64-bit iOS
- iOS Advanced Topics
- Features currently not supported by Unity iOS
- Troubleshooting on iOS devices
- Reporting crash bugs on iOS
- Android
- Getting started with Android development
- Android environment setup
- Unity Remote
- Android Remote (DEPRECATED)
- Troubleshooting Android development
- Building apps for Android
- Reporting crash bugs under Android
- Support for APK expansion files (OBB)
- Android Scripting
- Building and using plug-ins for Android
- Customizing an Android Splash Screen
- Single-Pass Stereo Rendering for Android
- Player settings for the Android platform
- Android 2D Textures Overrides
- Gradle for Android
- Android Manifest
- Getting started with Android development
- Windows
- Windows General
- Universal Windows Platform
- Getting Started
- Universal Windows Platform: Deployment
- Universal Windows Platform: Profiler
- Universal Windows Platform: Command line arguments
- Universal Windows Platform: Association launching
- AppCallbacks class
- Universal Windows Platform: WinRT API in C# scripts
- Player settings for the Universal Windows platform
- Scripting Backends
- FAQ
- Universal Windows Platform: Examples
- Universal Windows Platform: Code snippets
- Known issues
- Web Player
- Mobile Developer Checklist
- Experimental
- Legacy Topics
- Best practice guides
- Expert guides
- New in Unity 2018.3
- Packages Documentation
- Glossary
- Unity User Manual (2018.3)
- Working in Unity
- Creating Gameplay
- Prefabs
- Editing a Prefab in Prefab Mode
Other Versions
Cannot access other versions offline!
Editing a Prefab in Prefab Mode
To edit a PrefabAn asset type that allows you to store a GameObject complete with components and properties. The prefab acts as a template from which you can create new object instances in the scene. More info
See in Glossary AssetAny media or data that can be used in your game or Project. An asset may come from a file created outside of Unity, such as a 3D model, an audio file or an image. You can also create some asset types in Unity, such as an Animator Controller, an Audio Mixer or a Render Texture. More info
See in Glossary, open it in Prefab Mode. Prefab Mode allows you to view and edit the contents of the Prefab Asset in isolation, separately from any other objects in your SceneA Scene contains the environments and menus of your game. Think of each unique Scene file as a unique level. In each Scene, you place your environments, obstacles, and decorations, essentially designing and building your game in pieces. More info
See in Glossary. Changes you make in Prefab Mode affect all instances of that Prefab.
Entering and exiting Prefab Mode
There are many ways to begin editing a Prefab in Prefab Mode, including:
- Double-clicking it in the Project window
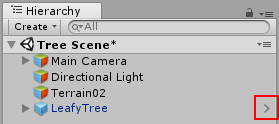
- Using the arrow button next to the Prefab in the Hierarchy window
- Clicking the “Open” button in the InspectorA Unity window that displays information about the currently selected GameObject, Asset or Project Settings, alowing you to inspect and edit the values. More info
See in Glossary window of a Prefab Asset
Entering Prefab Mode makes the Scene ViewAn interactive view into the world you are creating. You use the Scene View to select and position scenery, characters, cameras, lights, and all other types of Game Object. More info
See in Glossary and the Hierarchy window show only the contents of that Prefab. Here, the root of the Prefab is a regular GameObjectThe fundamental object in Unity scenes, which can represent characters, props, scenery, cameras, waypoints, and more. A GameObject’s functionality is defined by the Components attached to it. More info
See in Glossary - it doesn’t have the blue Prefab instances icon.
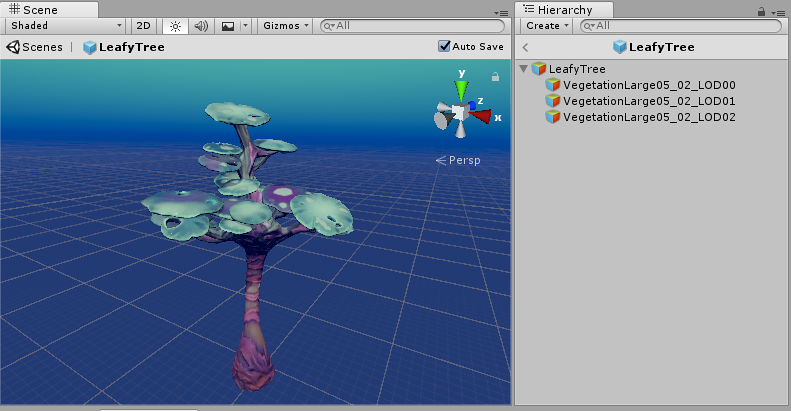
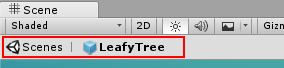
In Prefab Mode, the Scene View displays a breadcrumb bar at the top. The rightmost entry is the currently open Prefab. Use the breadcrumb bar to navigate back to the main Scenes or other Prefab Assets that you might have opened.
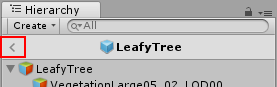
Additionally, the Hierarchy window displays a Prefab header bar at the top which shows the currently open Prefab. You can use the back arrow in the header bar to navigate back one step, which is equivalent to clicking the previous breadcrumb in the breadcrumb bar in the Scene View.
Auto Save
Prefab Mode has an Auto Save setting in the top right corner of the Scene View. When it is enabled, any changes that you make to a Prefab are automatically saved to the Prefab Asset. Auto Save is on by default.
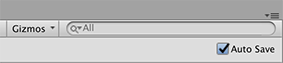
If you want to make changes without automatically saving those changes to the Preset Asset, turn Auto Save off. In this case, you are asked if you want to save unsaved changes or not when you go out of Prefab Mode for the current Prefab. If editing a Prefab in Prefab Mode seems slow, turning off Auto Save may help.
Editing Environment
You can assign a Scene as an editing environment to Prefab Mode, which allows you to edit your Prefab against a backdrop of your choosing rather than an empty Scene. This can be useful for seeing how your Prefab looks against typical scenery in your game.
The objects in the Scene that you assign as the editing environment are not selectable when in Prefab Mode, nor will they show in the Hierarchy. This is to allow you to focus on editing your Prefab without accidently selecting other unrelated objects, and without having a cluttered Hierarchy window.
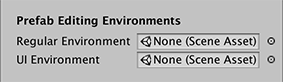
To set a Scene as the editing environment, open the Editor window (top menu: Edit > Project Settings, then select the Editor category) and go to the Prefab Editing Environment section. Use the Regular Environment setting for “non-UI” Prefabs, and the UI Environment setting for UI Prefabs. UI prefabs are those Prefabs that have a Rect Transform component on the root, rather than a regular Transform component. “non-UI” Prefabs are those which have a regular Transform component.
2018–07–31 Page published with limited editorial review
Nested Prefabs and Prefab Variants added in 2018.3
Did you find this page useful? Please give it a rating:
Thanks for rating this page!
What kind of problem would you like to report?
- This page needs code samples
- Code samples do not work
- Information is missing
- Information is incorrect
- Information is unclear or confusing
- There is a spelling/grammar error on this page
- Something else
Is something described here not working as you expect it to? It might be a Known Issue. Please check with the Issue Tracker at issuetracker.unity3d.com.
Thanks for letting us know! This page has been marked for review based on your feedback.
If you have time, you can provide more information to help us fix the problem faster.
Provide more information
You've told us this page needs code samples. If you'd like to help us further, you could provide a code sample, or tell us about what kind of code sample you'd like to see:
You've told us there are code samples on this page which don't work. If you know how to fix it, or have something better we could use instead, please let us know:
You've told us there is information missing from this page. Please tell us more about what's missing:
You've told us there is incorrect information on this page. If you know what we should change to make it correct, please tell us:
You've told us this page has unclear or confusing information. Please tell us more about what you found unclear or confusing, or let us know how we could make it clearer:
You've told us there is a spelling or grammar error on this page. Please tell us what's wrong:
You've told us this page has a problem. Please tell us more about what's wrong:
Thanks for helping to make the Unity documentation better!
Copyright © 2019 Unity Technologies. Publication: 2018.3-002V. Built: 2019-04-15.